Hello, design elf Katrina here again with a bit of a project for you all.
For those who know my work you might of noticed I do like a project. Something I can build up and play with and this is one of them. I must apologise as this is not something you can make in an afternoon or even a weekend but I wanted to make something that would show off just how wonderful this paper line is, so don't feel you have to make the whole thing, even if you get an idea out of it its worth it but if you would like to have one of your own then I can guarantee you will have great fun making it!!
So lets go, this is how I made my Steampunk spells altered book!
I used -
* An old hard back book, choose one on good condition and it must have a stitched spine. This is important as it needs to stand up to a lot, if it has a glued spine then it could fall apart.
* Graphic 45 Steampunk spells papers, stickers, banners, chipboard pieces and stamps
*Creative expressions glass vials
*Creative expressions bakers twine in black
* Couture creations craft knife
*Paperartsy pallet knife
* Payper Box pricking tool
*Metal edge ruler
*PVA Glue
* Moulding paste, you could use Paperartsy grungpaste
* Black acrylic paint
* Black powder glitter
* Stickles glitter glues
* Large needle
****************************************
OK, here is how I went about it! -
1. This is the book I chose, Hubby found it for me, a cool title but it doesn't really matter what your book is about by the time you have finished with it no one will know. Just as long as its not falling apart and has a stitched spine.
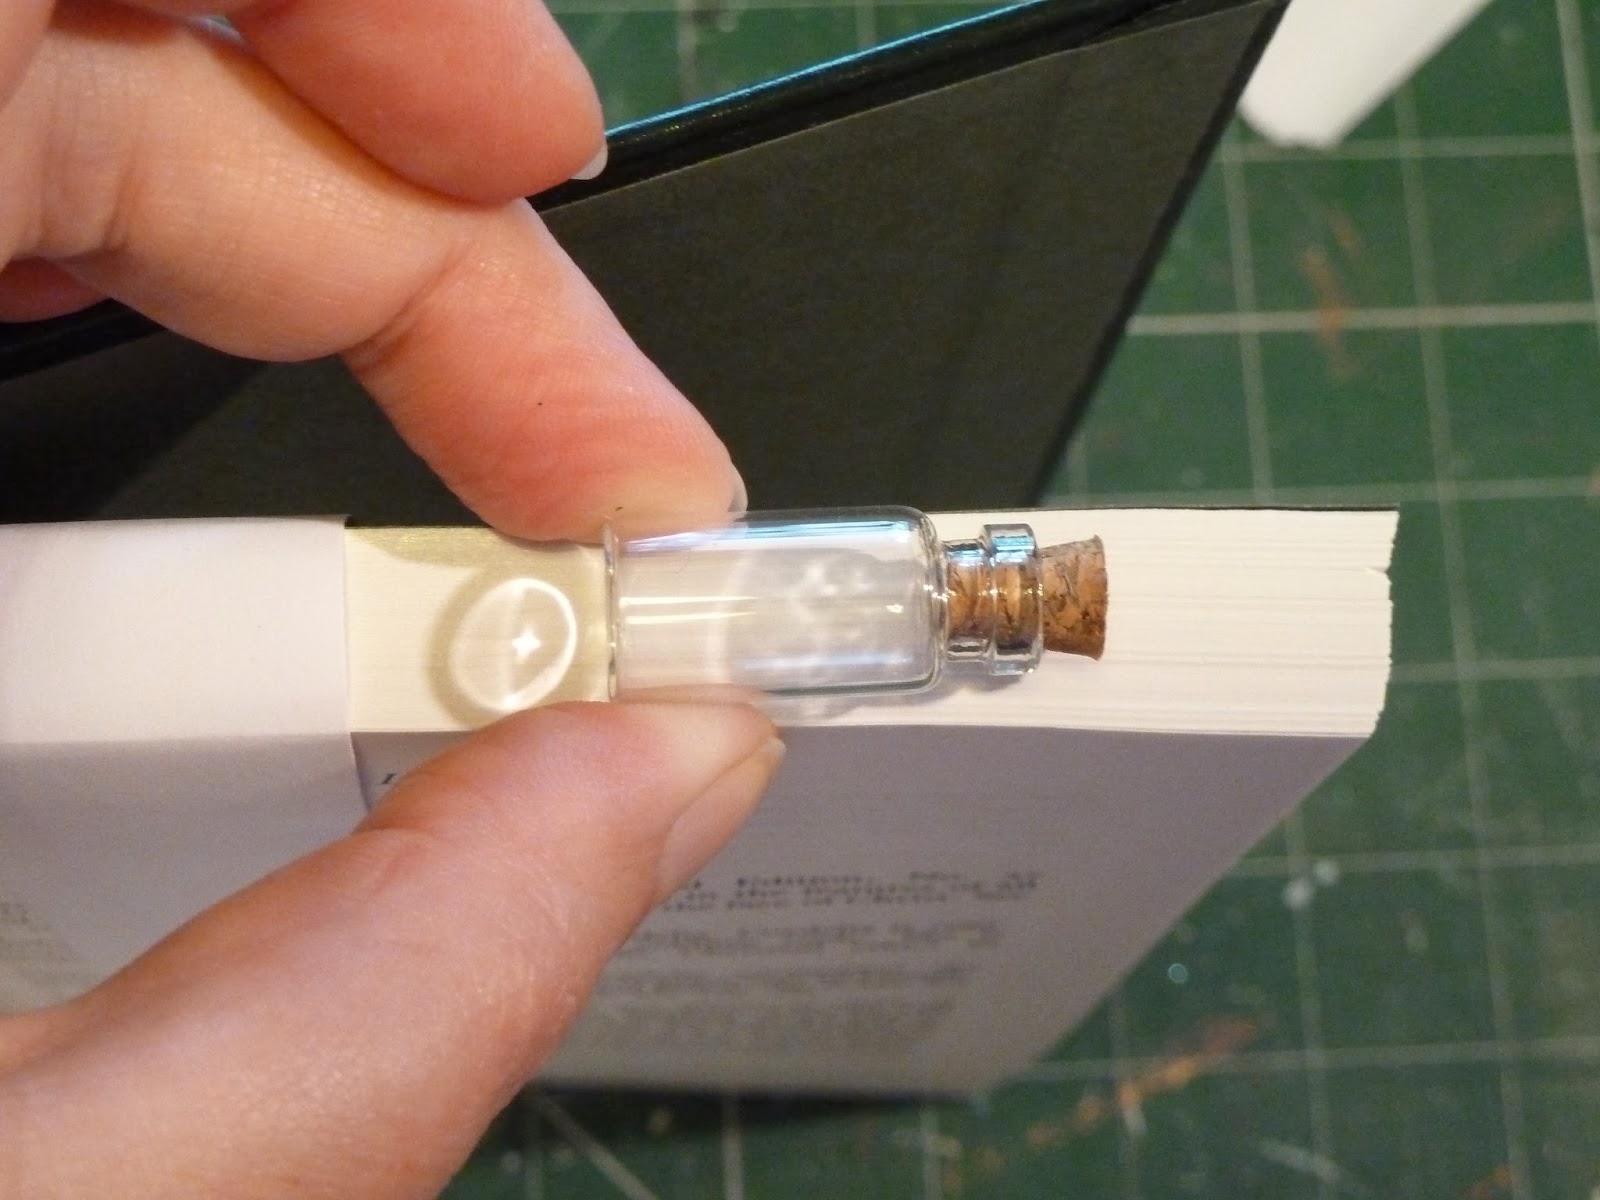
2. The book has a surprise at the back, a niche to hide your bottles of magic things, so the first thing we need to do is decide how thick that needs to be. Take one of your vials and use it as a guide as to how thick your niche will be, we will remove all the other pages from the book so make it slightly thicker then the vial.
3. Remove all the other pages from the book by cutting the stitches that hold them in place. You will also need to release the spine so we can work on it easily. Keep your pages as they will be nice to use in other projects.
4. We now need to make the pages we have left into a solid block. The way to do that is to hold the pages together and paint a generous amount of PVA glue around the 3 sides making sure you cover every bit of the surface. This needs to dry overnight.
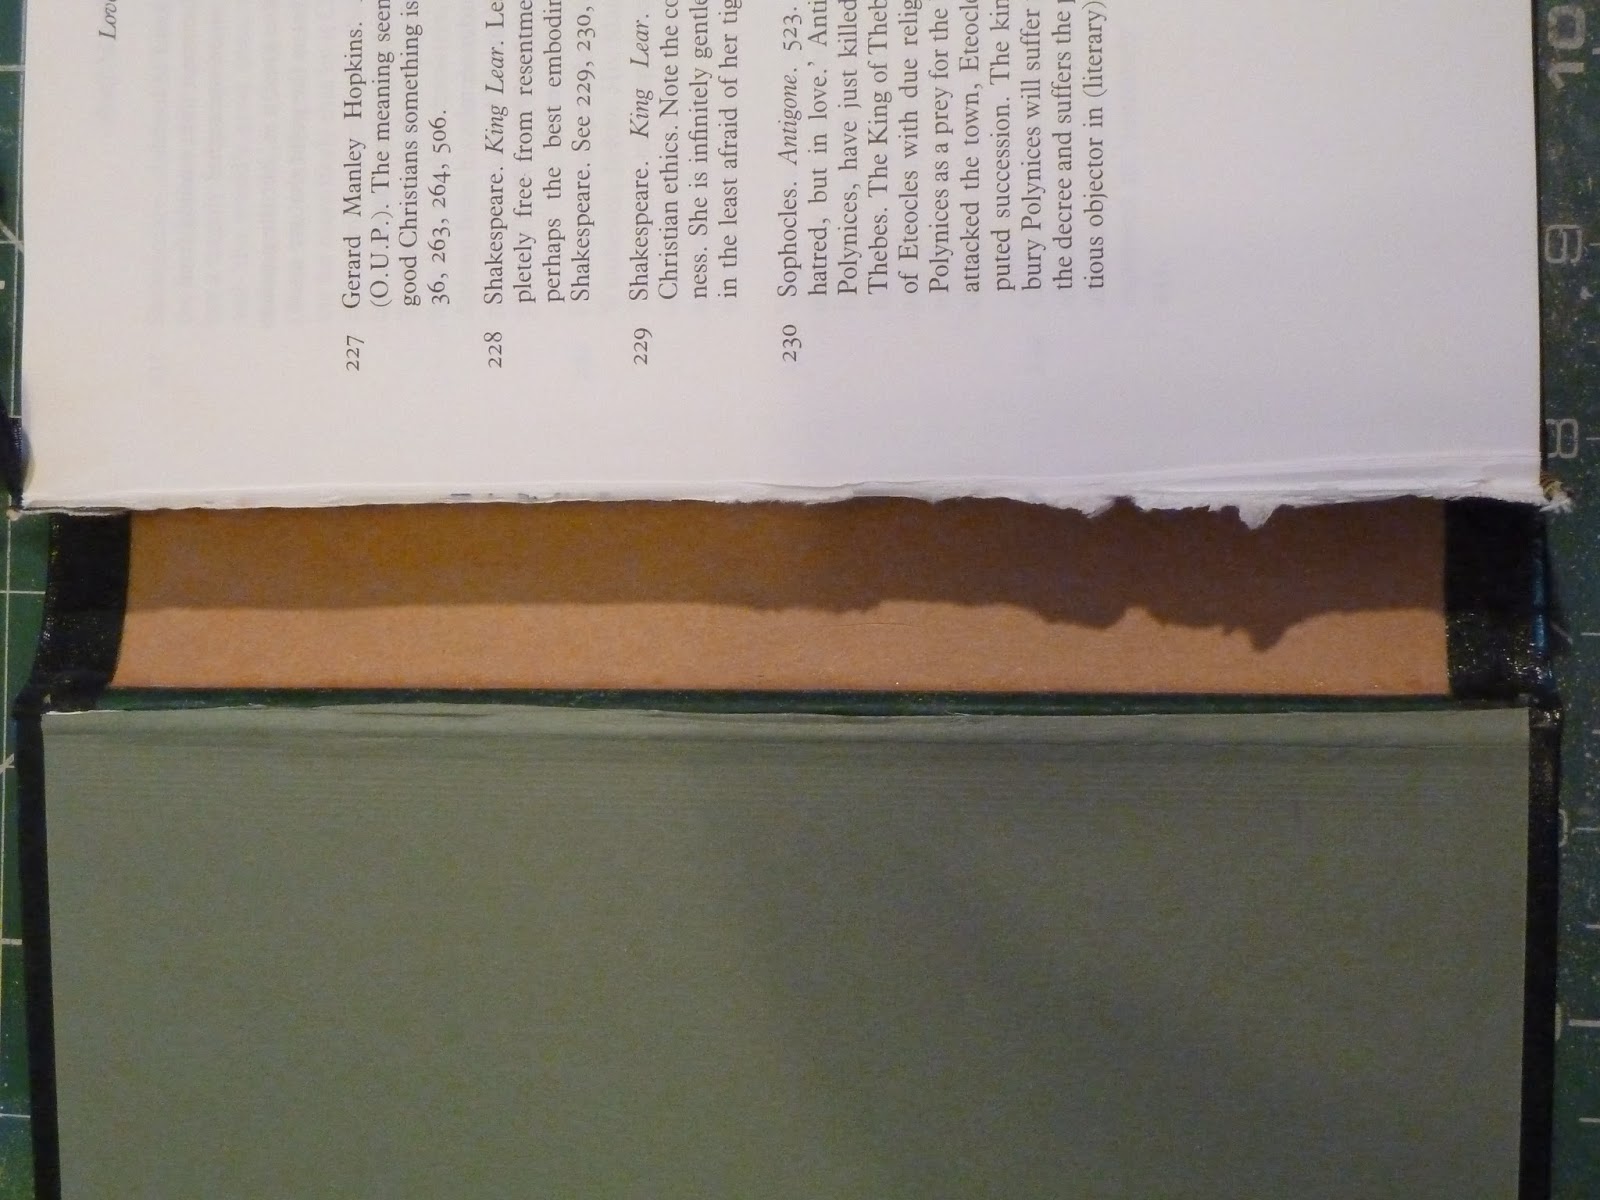
5. Once the pages are dry bring the spine back up to the side of the pages and mark the depth of your pages.
6. Draw a line with a ruler and mark out the piece that will be stuck back to your book eventually.
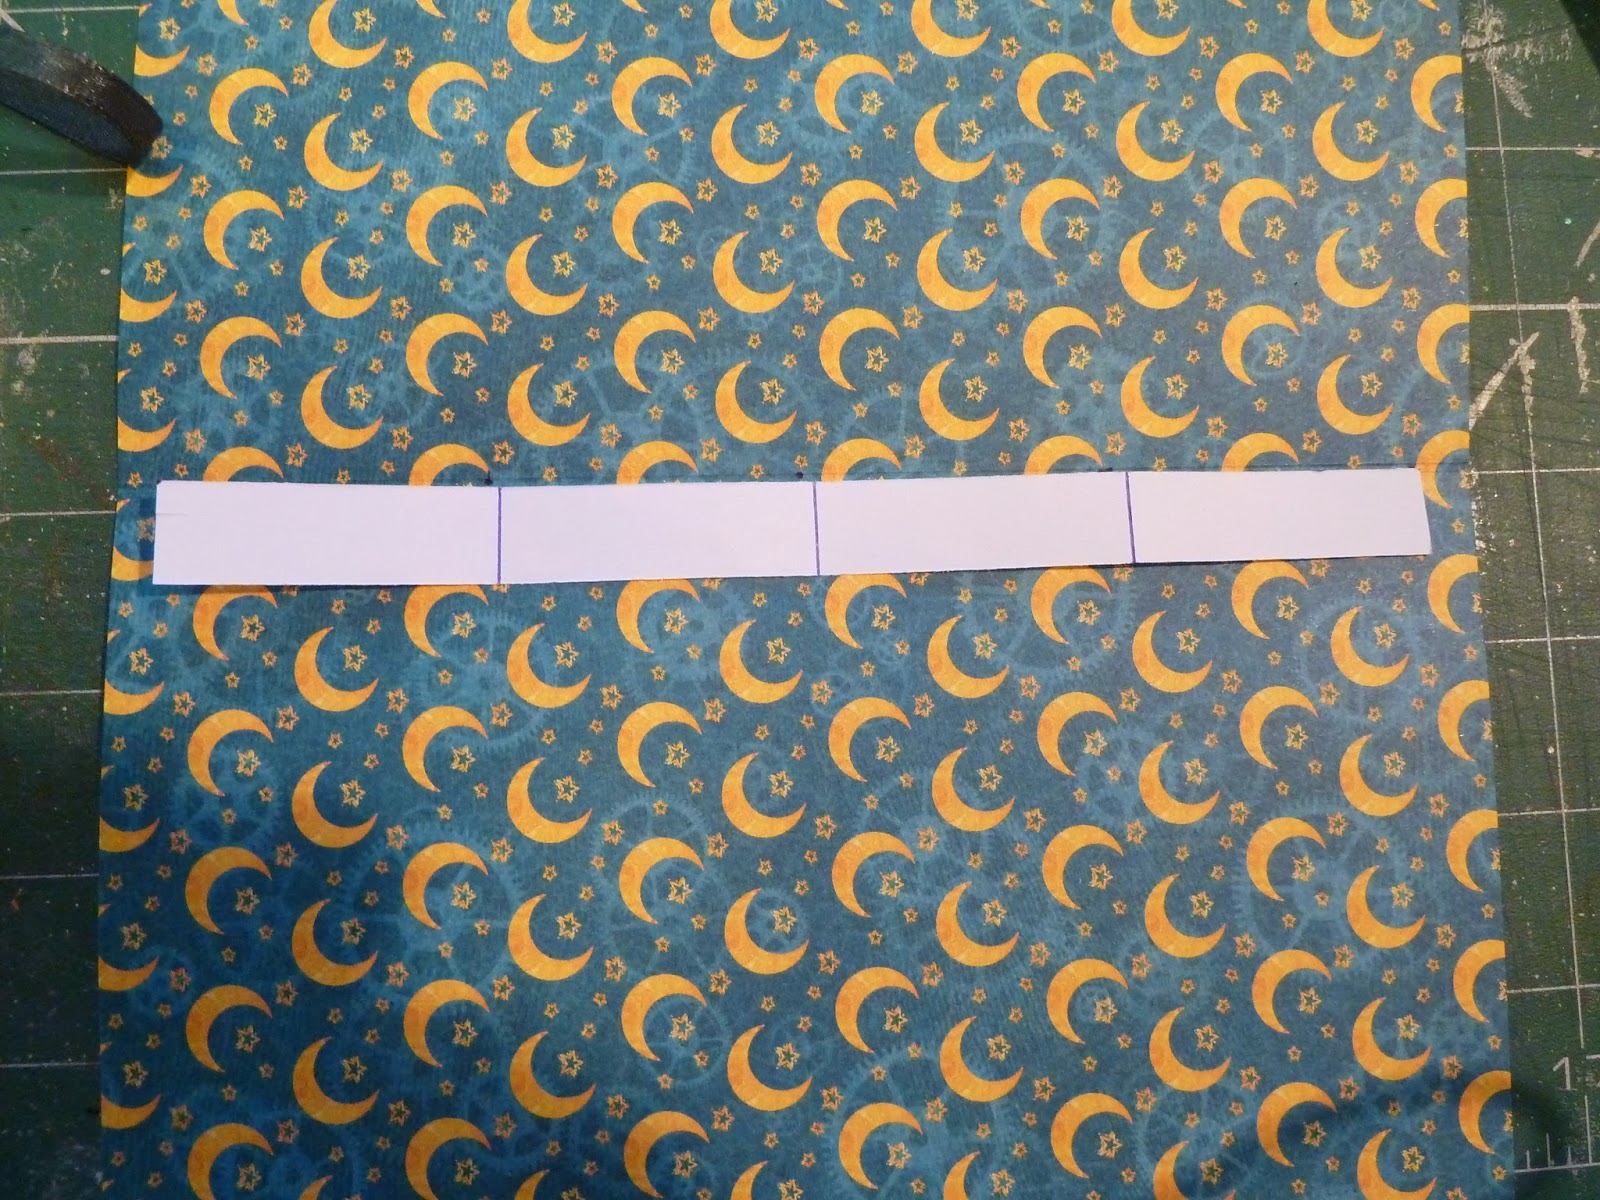
7. We now need to make a template for the stitching holes for our new pages. Take a strip of scrap paper the same length as your book. Fold it in half and half again then mark the lines with a pencil. We need to put in 3 new pages so draw 3 lines an even distance apart in the remaining part of the spine. Use the template to mark with a dot the holes for your sewing.

.
8.Use a page from your book as a template to make the new pages for your book. You will need 3 folded pages or signatures. Mine were 8x5 inches so I needed a strip 8x10 then folded in half to make each signature.
9. Then use the template to mark the sewing holes on the fold line of your signature and then use
pricking tool to make the holes.
10. Use your pricking tool to poke the holes through the spine too.
11. Now to make the niche. Mark out the part you want to cut out for your niche.
Make sure you have a new blade in your knife, believe me it will make life so much easier, and carefully, using a metal edge ruler as a guide, cut around your niche. This is going to take some time so take it easy, always use your ruler and just cut through a few pages at one time. Pull the cut pages out then cut again. Don't try to go through the whole thing at once, you will get a better finish doing it a little at a time. Take a break if your hand gets sore.
You need to make it deep enough so your vial sits in it nicely. You can tidy up any scrappy bits at the end of the cutting.
12. Now is a good time to paint everything. I painted the inside of my book, niche and all, with black acrylic and left it to dry overnight.
I then rubbed the front cover down and painted that with the same black acrylic. I chose one of the cards from the 12x12 vintage voyage paper as my focal point. I also wanted a lot of texture on the cover so I mixed up some moulding paste and the black paint with some black glitter and applied it over the back cover and around the card on the front in a sort of stippling action to give lots of texture. In some of the places I pushed it through a stencil to add even more texture.
You will need to do this in sections and leave them to dry. To stop your moulding past drying out cover it up with cling film and it will last a few days.
Paint the spine of your book but don't add the texture until we stitch the pages in.
13. Now it is time to stitch in your new pages. If you have never done this before, don't worry it is very easy and you won't see the stitches at the end anyway. I will try and describe how to do it here but there are many good You tube videos that might make it a lot clearer if you get stuck. I used the bakers twine to stitch mine in as I liked the look but any strong thread, I often use cheap embroidery thread too. You will also need a large needle.
We want to start on the outside of the book as that is where we want the knots so we can cover them after. So with a nice long piece of twine in your needle and the first new page inside the book, push it through the second hole from the top and out through the middle of your first page leaving a nice long tail to use to tie you knot at the end. The holes should line up as you used the same template to make them all!
Then all you need to do is a back stitch using the holes you have made and end up either in the hole above or below the one you started with so you can then tie your ends together tightly. Repeat with the 2 other pages. Your spine should now look like this. I like to add a dot of PVA on each knot just for extra safety. I then covered it all up using the same moulding paste mixture.
Your new pages will look as if they have always been there. I then stuck the spine back to the book pages at the back so it looked like a normal book again.
Well that is how I made the bones of the book!! Now all you need to do is decorate it. I had decided to make shelves for my niche for my bottles so I covered pieces of foam board I had over from another project but you could use stiff card and stuck them in to the niche.
For my vials I wanted labels for them so I used a set of rubberstamp and cut them out, aged them and stuck them to the bottles.
*****************************************************************
So here is my book finished, all using the Graphic 45 Steampunk Spells papers, stickers,stamps banners and chipboard pieces. I have added the odd die cut from my own crafty bits. Any questions about any of this, just ask!
On the front cover I added a banner from the banners pack, using bakers twine to hang them from. The flower was make from the flowers pack and the spells tab from the Tabs and pockets pack.
The inside cover has a piece of the 12x12 Tick Tock paper, a couple of the stickers and some die cuts, both from the Tim Holtz alterations collections Vintage Lace and the cobweb one.
The first page is a piece from the 12x12 Frightful folly and die cuts
The next page is Mr Seymour Bones page, using some of the card pieces from the 12x12 nevermore and frightful folly. The flower from the flowers pack, the pocket from the Tabs and pockets pack. I cut a cabinet card shape from the 12x12 spells beware to back the stamp style piece from the 12x12 frightful folly. I also used some of the pieces from the chipboard packs.
For Miss Ima Fraid page I used the stamp piece from the 12x12 frightful folly backed with a piece of coordinating purple card, cut in the cabinet card shape and then stamped in black using the bat and swirl stamp from the spooky stamp set. I also used some die cut bats, stamped again with the swirl stamp and dusted with purple mica powders.
The other page I used some more of the card pieces from the 12x12 nevermore and a couple of the chipboard pieces too
Here I used pieces from 12x12 frightful folly and nevermore papers along with some die cuts and a small sticker from the sticker sheet and chipboard piece
Next is Madame Macabre. I used her stamp piece from the 12x12 frightful folly backed with some contrasting blue card and stamped with the gears from the frightful stamp set and the script from the spooky stamp set. I also used a flower from the flower pack and a couple of pieces from the chipboard packs. For the other page I used a
pocket from the pocket and tabs pack and a couple of the cards from the 12x12 nevermore paper.
The last of the pages belongs to Dr Dreadful! Again I used his stamp style piece from the 12x12 frightful folly paper backed on the blue card cut as a cabinet card and stamped using the spooky stamp from the spooky stamp set and the gear from the frightful stamp set. For the other page I used another of the pockets from the tabs and pockets pack and a couple more of the cards from the 12x12 nevermore paper. I also used stickers and chipboard pieces.
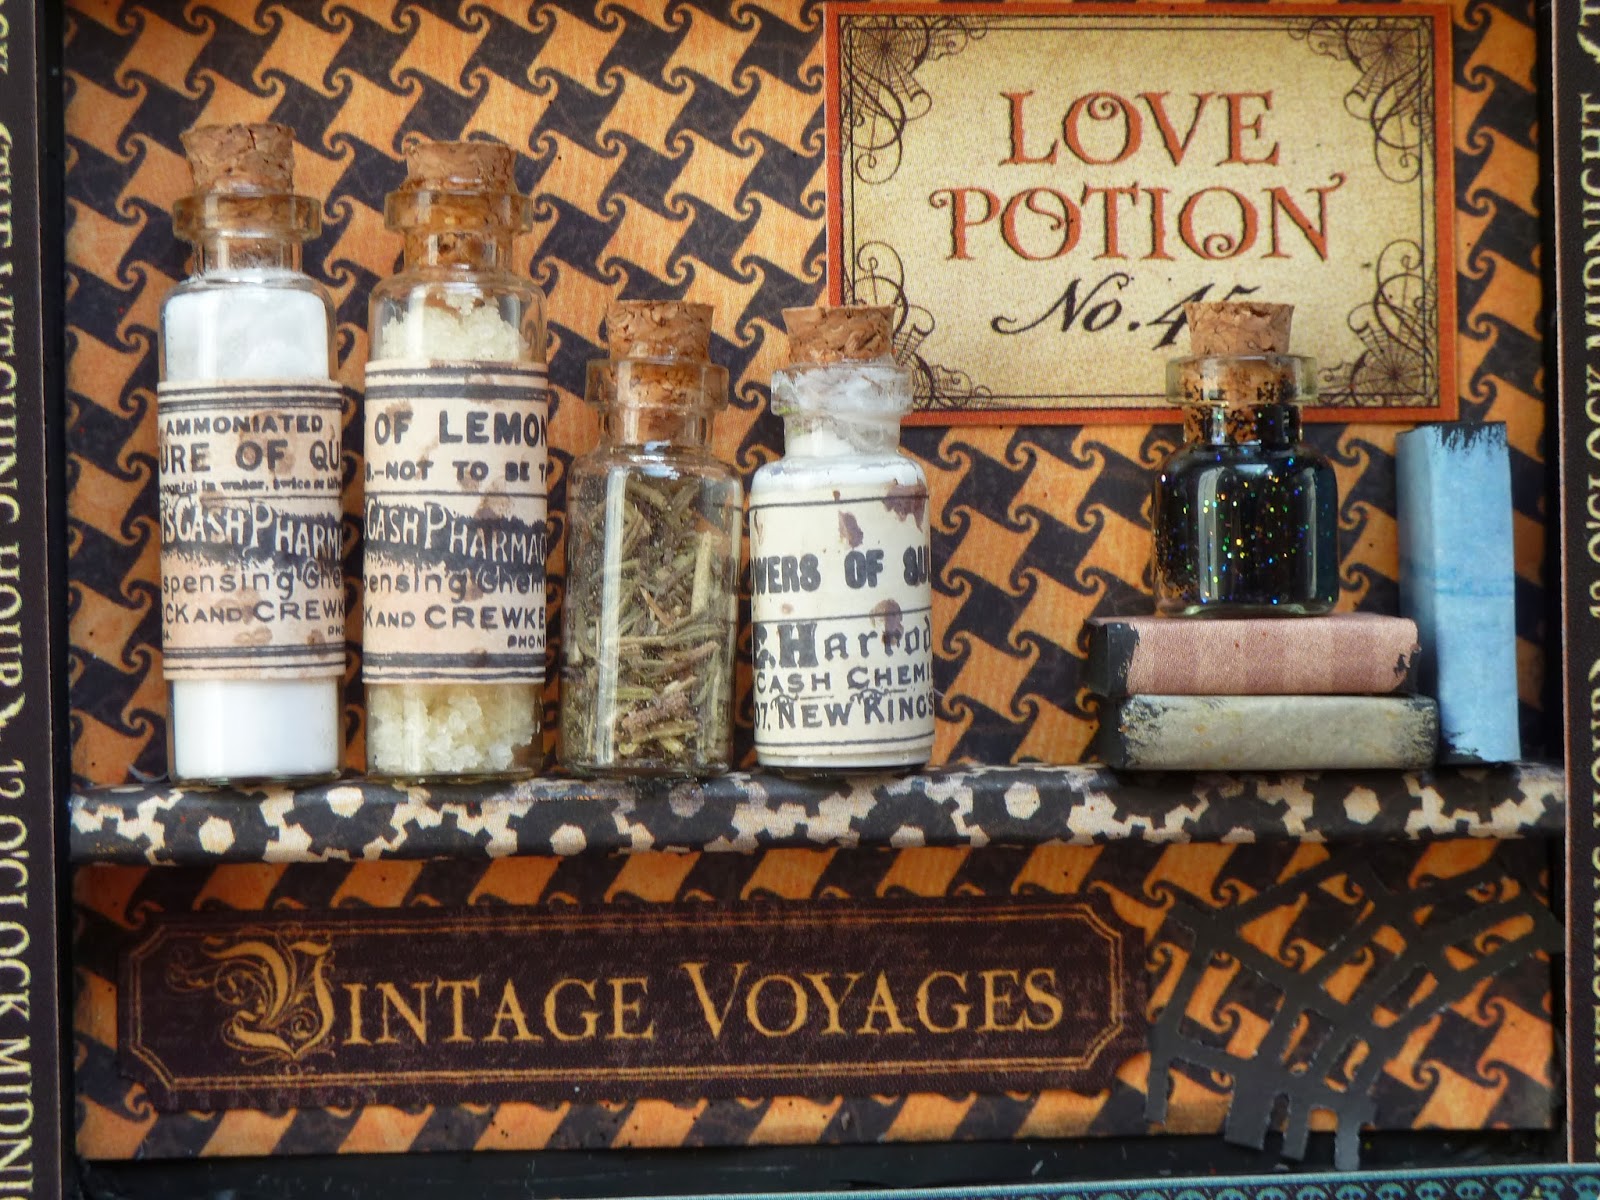
The niche I backed with some of the 12x12 Tick tock paper. I then added shelves and made some little books by covering small pieces of foam core with paper. The little bottles were filled with anything I could find around the house from bicarb of soda and dried herbs to ink and glitter glue. I then sealed the corks into the bottles with glue so they won't leak.
I then decorated around the niche with some of the borders from the sticker sheet and the small word stickers and corners. I also filled in the gaps with other stickers.
The ribbon I decided to keep and added a cute die cut owl I glittered and added a sticker to finish it off.
Thank you so much for sticking with me till the very end. I apologise for such a long post, I promise to do some quicker smaller projects next, honest!! :)
Happy crafting
Love Katrina
_edited.jpg)
_edited.jpg)
_edited.jpg)
_edited.jpg)
_edited.jpg)

_edited.jpg)
_edited.jpg)
_edited.jpg)
_edited.jpg)
.JPG)
.JPG)


_edited.jpg)


.JPG)


.JPG)

.JPG)
.JPG)