Tuesday, 6 November 2012

Phone charms not just for phones!!

 I love to use these phone charm clips for all sorts of things except hanging from my phone, no hole.


I use them to identity my memory stick, hang from zips, all kinds of things and these cute little God beads are ideal to hang from the end. I mixed them up with some handmade paper beads made with scraps of the Ruby Rocket kit which matched perfectly.


Or the word tiles look good on the end of them and of course the pendant I made in my last melt pot session was also the right size.


These would make great cracker prizes or just a little gift to pop in with a Christmas card. What will you hang from yours?????

Thursday, 4 October 2012

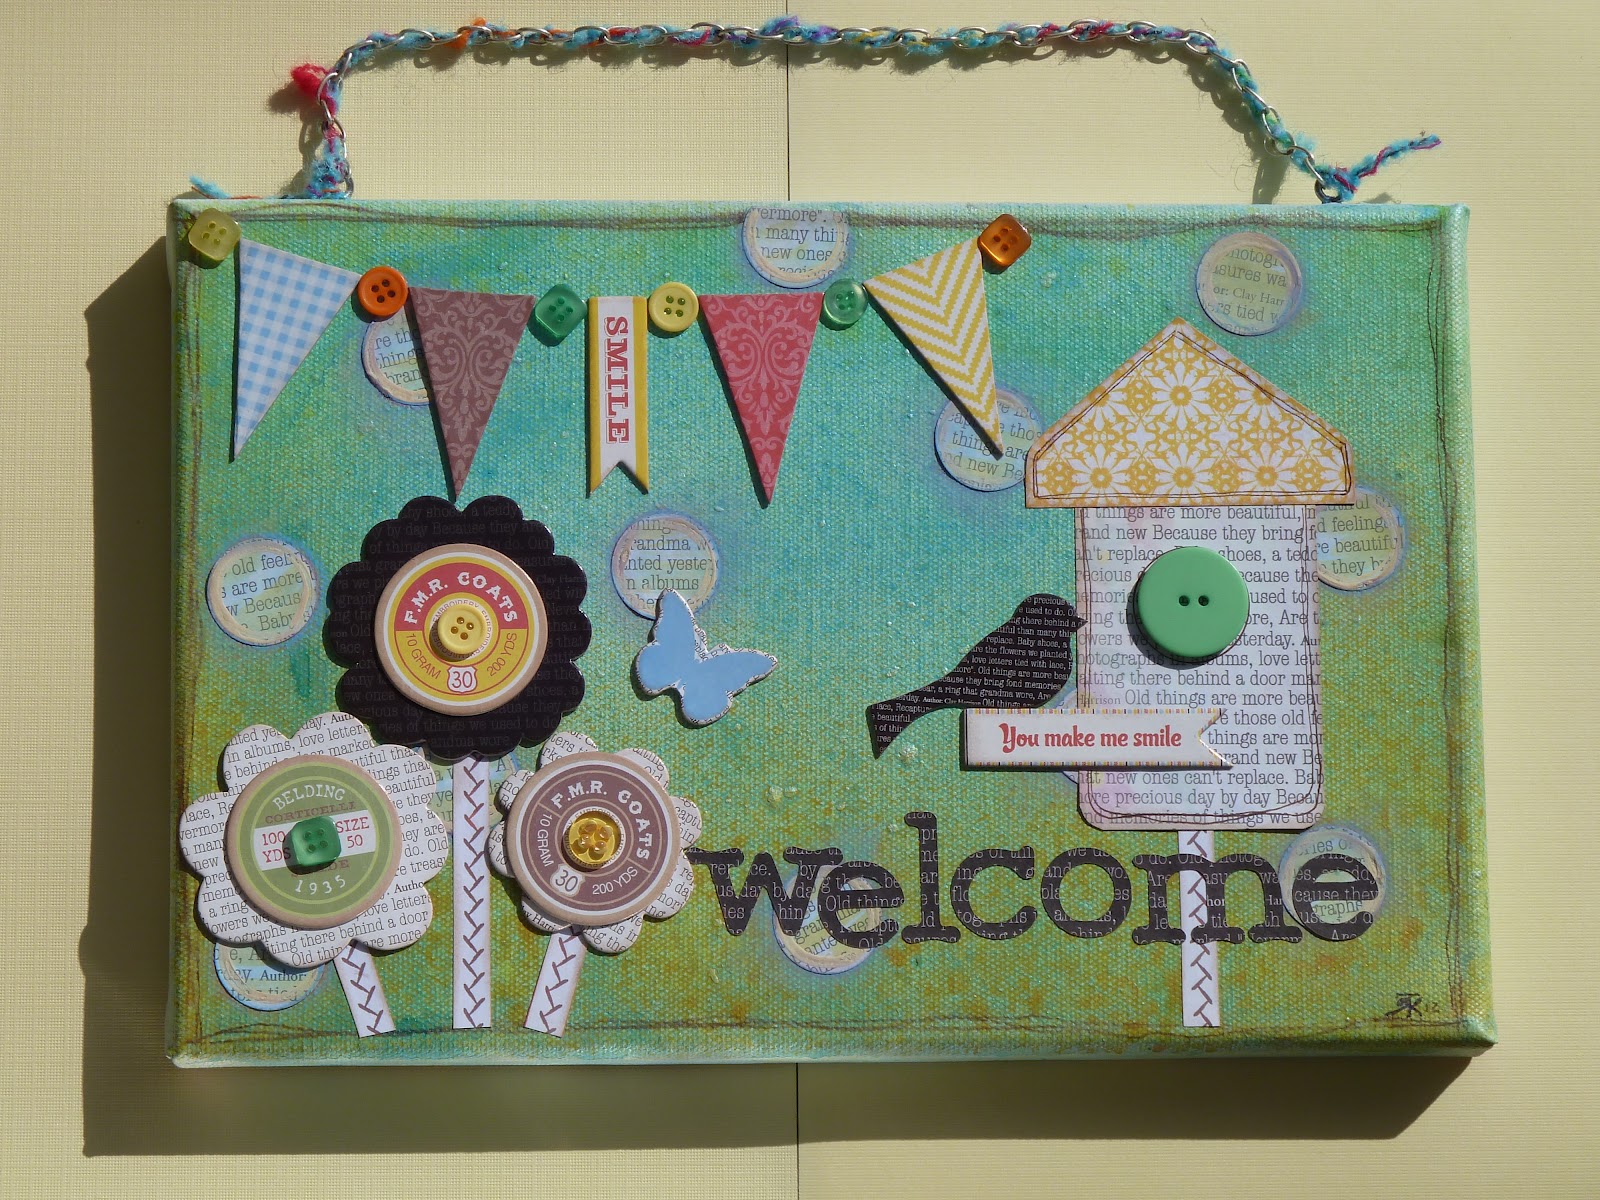
Canvas Welcome Sign


Hi everyone, Katrina here from the design team.
 
 
As you can see I have been playing again with the Ruby Rocket Nostalgia collection. This time I teamed it up with the Cosmic Shimmer chalk misters, they were made for each other and a 12x8 canvas to make a welcome sign.

   The bare canvas was sprayed with the following colours of misters - Pastel Orange chalk mist, Pastel Blue chalk mist, Pastel yellow chalk mist and then to give it a bit of shimmer the Egyptian blue vintage mist. I also sprinkled a tiny bit of Cosmic Shimmer Mica Pigment Pearlescent powder.


Once that was dry I played about with the chip board pieces from the Ruby Rocket Nostalgia Collection Pack and some buttons form the Button Assortment Halloween which are just the right colours untill I was happy with the look. The stems and bird house along with the welcome word is cut from some of the paper in the pack but everything else is in the chip board pack.


To finish the sign off I added Bead Cafe Large Link Silver Chain and threaded some wool I had through it to soften it a bit and its ready to hang in the hall and welcome all my visitors!


Hope you like my sign, why not give it a go yourself, they would make great presents for Christmas ( I know I said the "C" word but its getting very close now )
 
What ever you are making happy crafting! love Katrina


Saturday, 22 September 2012

Sale 15% off everything

Our usual September sale
15% off Everything

Come and grab a bargain or just try something you've had your eye on for a while
Don't forget we still have free postage too...

Thursday, 9 August 2012

Alice in Wonderland

Hello, Katrina here. I have been re visiting my love of stamping using the lovely IndigoBlu Alice stamp plates. I especially likes the original art from the book. I was also playing with the Cosmic shimmer chalk mists, if you are not a fan of the sparkle you get with the mica sprays or want a different look then give these a go, I love them and they went so well with the stamps.
Tea Party Alice Card


I used -
* Cosmic Shimmer Chalk Mist Pastel Blue
* Cosmic Shimmer Chalk Mist Pastel Pink
* Cosmic Shimmer Chalk Mist Pastel Purple
* 25 Craft UK A5 Card Blanks White
* IndigoBlu Rubber Stamp Plate Alice 2
* IndigoBlu Rubber Stamp Plate Alice 1
* Craftime Enchanted Paper Flowers
* Craftime Enchanted Pearl Gems
* Creative Expressions Bakers Twine Black & White 50 Yds
* edging die or punch
* Pages from Alice in wonderland
1. Use the chalk mists to spray a piece of A4 card, dry in between colours.
2. Stamp the image of Alice at the Tea party and Alice in Wonderland onto white card, cut out and mat onto black card, cut a small border. Cut or punch your border top and bottom of a mat cut from your misted card. Mount Alice onto it.
3. Cover the front of your card with the pages of your book and ink around the edges. Tie a piece of the Bakers twine around the card.
4. Cut out the Alice in Wonderland and ink around the edges.
5. Use 3D tape to attach the main image to the card and add some flowers and the Alice in wonderland, add gems to the flowers middles and you are done!
 
Sorry it's late card

My next card is a little sorry its late card. We all miss a birthday now and again and this little card is just so cute, I'm sure they will forgive you!!
I used -
* Part of the card you misted for the first card
* IndigoBlu Rubber Stamp Plate Alice 2
* Artistic Stamper Time & Keys A5 Plate
* Plain white card
1. Cut your card blank from the card and stamp the Alice Stamp image with the watch and some clock images from the time stamp plate along with the late saying and cut them all out.
2. Cut a piece of the sprayed card to fit your card and stick down. Ink around the edges.
3. Arrange all the images on the page and once you are happy stick down.
4. Cut sorry from a die cut alphabet or use sticker and your done!
Rabbit tag
 
I just had to use the rabbit image and so made up this little tag.
I used -
* IndigoBlu Rubber Stamp Plate Alice 2
* IndigoBlu Rubber Stamp Plate Alice 1
* Card you misted for the first card
* Bakers twine
1. Cut the misted card into a tag shape
2. Stamp the rabbit and cut him out, stamp curiouser and curiouser and cut out too.
3. Arrange and stick on your tag.
ATC
And lastly I made a little ATC using the Tweedledum and Tweedledee image and the rhyme from the book. Its amazing how far 1 A4 sheet of card will go.
 
All these from just 1 A4 sheet, promise!!

Monday, 30 July 2012

Enchanted Family Album

Enchanted family album
 
 
As soon as I saw the new Enchanted papers from Craft Time I thought of the old cabinet cards I have of my family. I used a new binding method I have learnt called "stack the deck". This is a really easy , quick method to make your own book, the inventor recommended using envelopes as the pages but I had the idea of using the Woodware cd selves. They make nice sturdy pages and cover and have the bonus of being the perfect colour too. Here is what I used and how I made it.
You will need -
 
* Woodware Cd sleeves - 12 pack ( I used 6 for my book )
* Craftime Enchanted A4 Printed Papers
* Craftime Enchanted Metal Roses
* Craftime Enchanted Ribbon
* Craftime Enchanted Rub Ons White
* Craftime Enchanted Pearl Gems
* Scraps of craft card - for your binding
* Magnetic dots
* Double sided tape
* PVA
* Silicone glue
How to put it together-
1. Put 6 of the Cd cases together using PVA glue
2. Make up your "Stack the deck" binding - a)Bottom layer - Cut a strip of card 2.75 " x length of your page then score at 3/4" from right side and 3/4 " from left side
b) middle layer - 2.25" x length of page scored at 3/4 from right side and 3/4 form the left
c) top layer - 1.75 x length of page scored at 3/4 from right side and 3/4 from left
3. Stack them on top of each other and glue together.

4. Apply double sided tape to both sides of the flaps on your binding and then stick them to the inside of the Cd cases, these will give you your pages.
5. Now to decorate your book. Cut the papers to fit your pages. You get 2 of each so I used 1 to cover the page and then cut the flowers out of the other and decoupaged them on top.
6. For the cover I cut a strip long enough to go around the front cover, spine and about an inch onto the back cover. If you want to put a magnetic dots onto your cover for the metal flower closure, do this before you stick the paper down. Stick the front piece to the front cover crease the spine fold but don't stick down, the stick the remaining strip to the back cover.
7. Now stick your ribbon onto the back cover. Cut a piece of paper for the back cover and stick down.
8. Add your photos and embellishments to your page as you wish. Finish off with the rub ons, which a great to use and pearl gems. Glue the metal rose to the end of your ribbon closure and snap your album closed.