Showing posts with label Katrina. Show all posts

Saturday, 23 March 2013

Steampunk technique book page #5

Hi There Katrina the Fruit Pixie design Elf here with the last page in my Steampunk technique book. For this page we are going to emboss and paint good old kitchen foil.


   Here is my step by step instructions for making my page but you can use this technique for any project you like.


  1. Emboss your kitchen foil using the Tim Holtz alterations steampunk embossing folder. It embosses beautifully!


2. Using a wet glue stick it to a cardstock page and leave to dry. Then paint it with metallic acrylic paint and leave to dry.

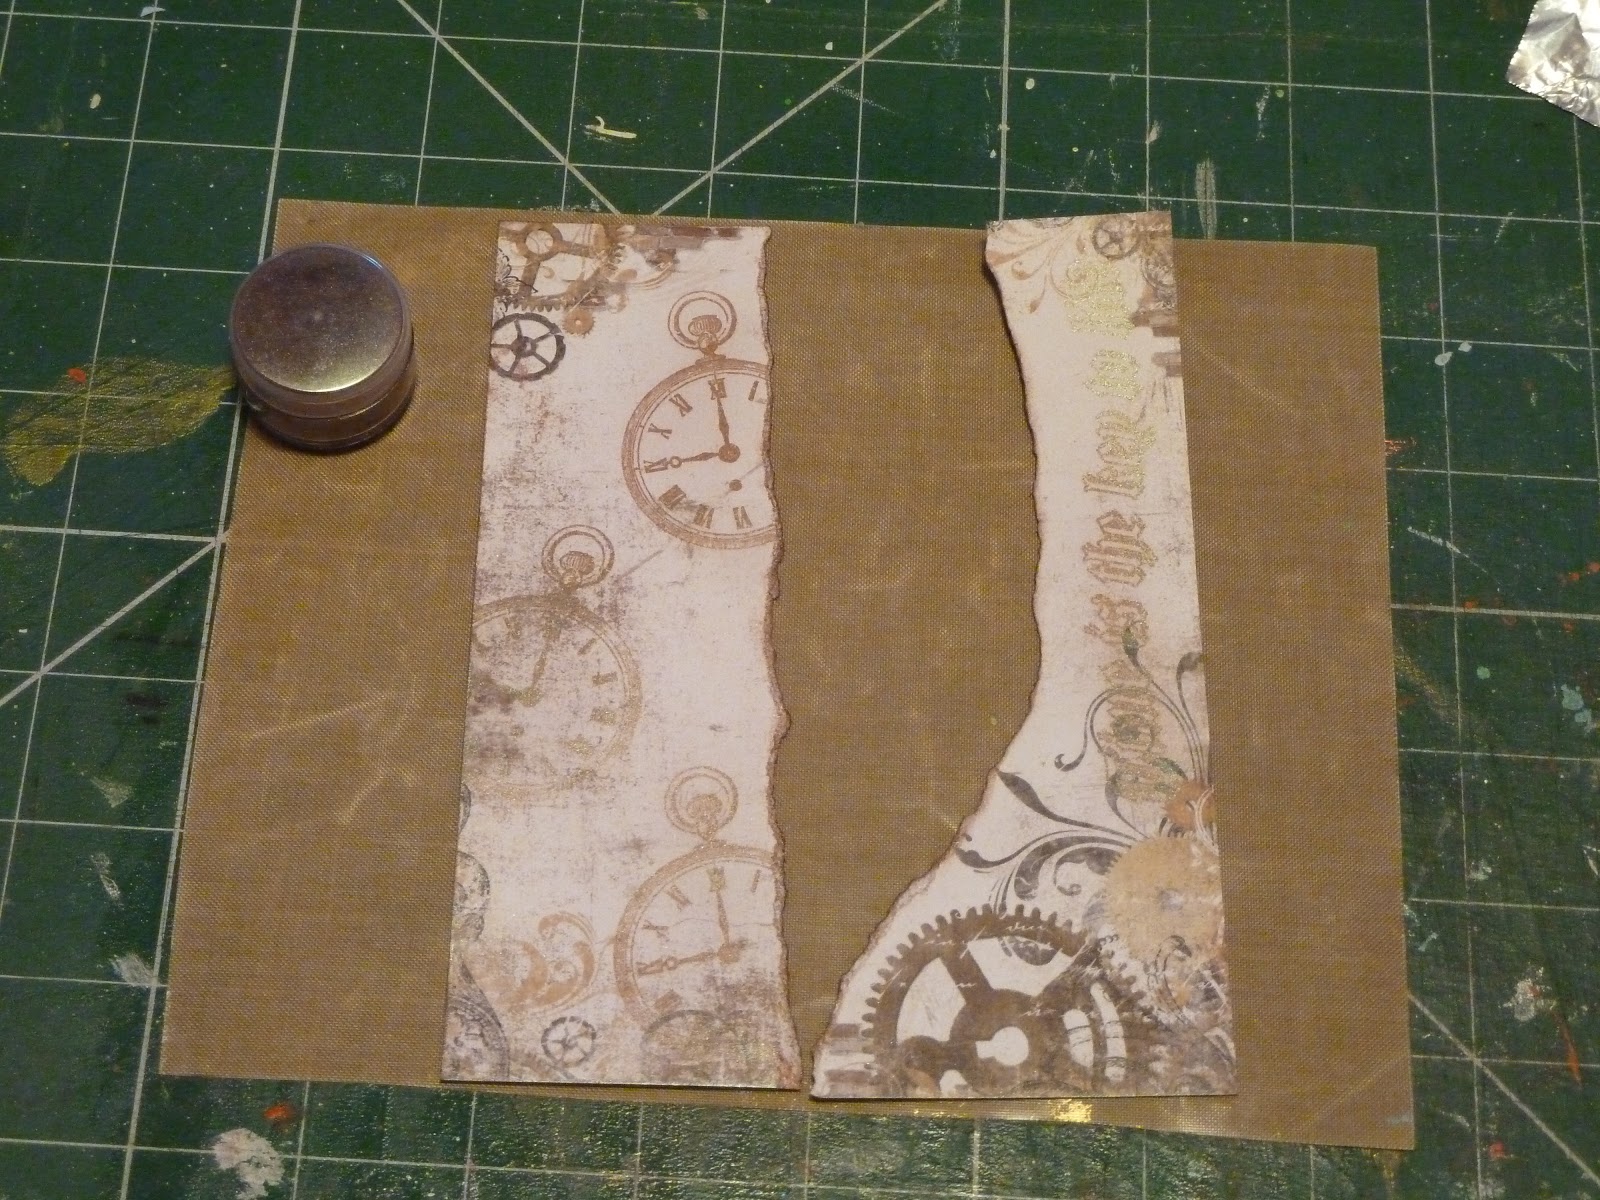
 3. Choose a piece of the Bo Bunny Time piece paper and tear it in half. Then tear part of the middle out so it fits you page with a gap in the middle for the foil to show through.


4. Choose the stamp you like from the Artistic Stamper time key stamp plate and stamp them on to the Bo Bunny Timepiece paper in a random pattern using a VersaMark ink. Gently brush the Imagination mica power over the VersaMark stamped image.


5. I stamped watches on one side and a phrase on the other in the same way.
6. Then stick your paper onto your foil and embellish as you wish. I painted an Eco Green chipboard cog with the same metallic paint and added one of the Bo Bunny trims. The large crystal in the middle of the cog also comes from the Bo Bunny trims.
This is the last page in my Steampunk technique book. I hoped you enjoyed them and picked up something new along the way. Have fun with all these techniques and make them your own.
Happy crafting,
                               Love Katrina

Wednesday, 20 March 2013

Clearance Sale


Our clearance sale continues apace, while some lines have almost sold out (Fresco Finish, Eco Green Paints & Walnut Hollow Creative Metal) we are still adding reduced lines.
 
We are currently selling the following products at 50% off RRP;
 
Jenni Bowlin
Dovecraft
Jillibean Soup
Selected Bo Bunny Lines
Imagination Crafts
Eco Green Crafts
Kanban
La Pashe
7 Gypsies
Black Market Paper Society
Selected Craft UK Card Blanks
 
also all Christmas stock and wood mounted stamps are now reduced, so come and grab a bargain before it all goes...
 
New products are arriving daily and we've just opened boxes of new unmounted stamps and gilding flakes and glitters from Creative Expressions so keep an eye out for them appearing on the site in the next couple of days.
 

Tuesday, 19 March 2013

Steampunk technique book page#4 embossing folders

Hi there, design elf Katrina here with the penultimate page in my Steampunk technique book. This time using your embossing folders in a slightly different way.

Here is how I achieved my look


Place your embossing folder, I used the Tim Holtz Pocket watch and Steampunk texture fade for this page but any embossing folder will do, place under your chosen Bo Bunny Time piece paper.


Using a wax crayon, I used 2 different colours, rub over the paper and you will pick up the texture pattern from the embossing folder underneath


Then add your ephemera. I used a scrap of music paper and gramophone paper but you could do this technique on any card or scrapbook page.

Happy crafting!
                                     Love Katrina

Friday, 15 March 2013

Steampunk page #3 stamping

Hi there Katrina the design Elf here with my 3rd Steampunk page to show you and this time the technique is stamping.

   Now I do have a bit of a confession to make, I got so carried away with this page I totally forgot to take any photos along the way but I will talk you through the process instead.


  OK here is how I did it.

1. I took a piece of Crafthouse Press Watch face paper and a paper for the back, cut them both at the same time using the Tim Holtz alterations cabinet card die. Then keeping them together cut to the size of your page.

2. Stamp the Artistic stamper Slow Fast stamp and 2 of the Judikins instrument block images you like twice too and cut them out. Distress them using the Tim Holtz distress ink.

3. Cut 2 pieces of acetate to fit your page and using a clear dry glue stick the stamped images back to back then to one of the pieces of acetate. Once dry stick the 2 pieces of acetate in between the 2 pieces of cut paper making sure the shapes line up.

4. Decorate the page with 7gypsies Numbers rub ons and any other embellishments you want!


I have 2 more pages and techniques to show you then onto something new!

  Happy crafting
                                           Love Katrina

Tuesday, 5 March 2013

Steampunk page #2 embossing

Hi there, Katrina the design elf here with the second of my Steampunk pages. I like different sized pages in my books to add interest and to use up those scraps too !!

  This page also uses the Tim Holtz edge dies and embossing plates to give it a steampunk look. Here is how I made my page....


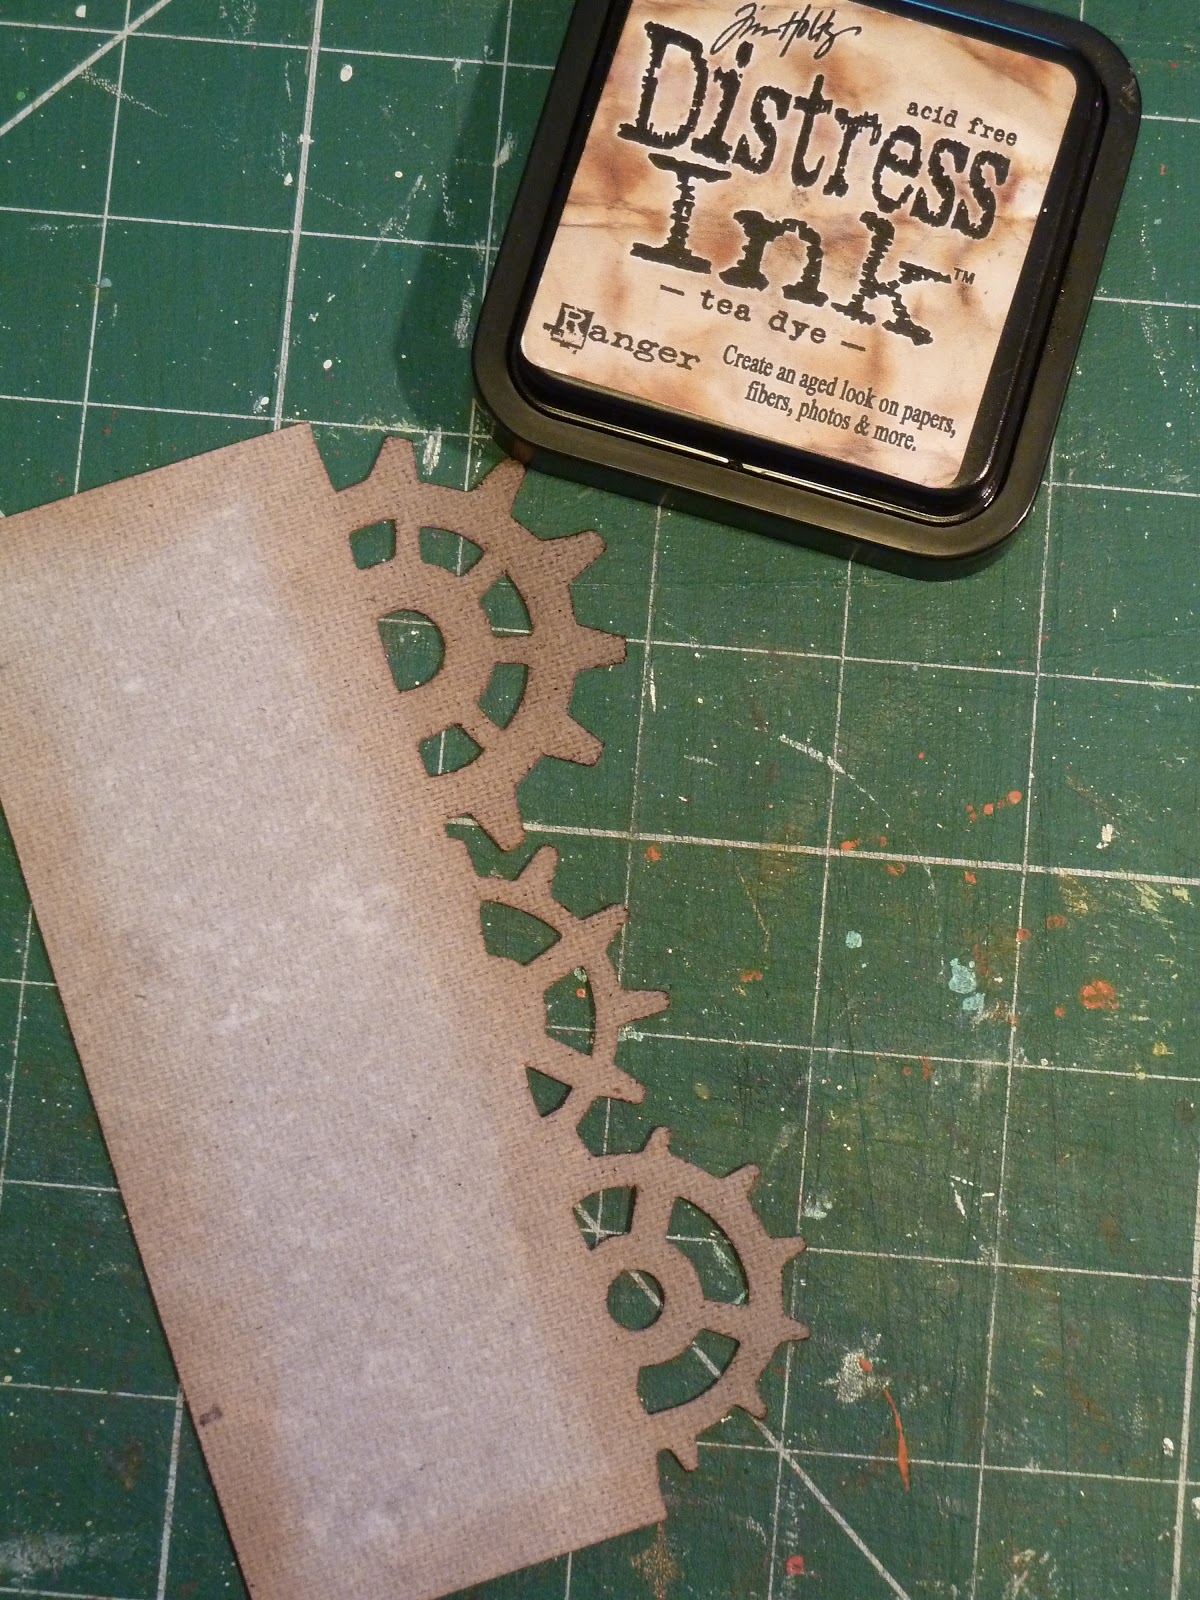
First I cut a piece of Grunge board and using the Tim Holtz on the edge die Steampunk. Then using the Tea dye distress I inked the edges on both back and front. This didn't really give me the look I wanted so I .....


Reached for the Imagination craft mica powders velvet dream. I took a tiny amount of powder and added a drop of water and mixed it into a paint. I then painted the edges front and back.


I then cut a piece of the Bo Bunny Timepiece paper and ran then through the Watch and Steampunk texture fade and then rubbed some of the Tea Dye distress ink onto the embossed paper using the application tool.


 Here are my finished pages. Of course you can use any images or photos you want too, just have some fun with it.

         Happy Crafting
                                     Love Katrina

Friday, 1 March 2013

Steampunk page - masking tape technique

Hi there Katrina the resident Fruit Pixie designer here with my first page of my Steampunk book. My idea for this book was to share my favourite mixed media techniques, so here is the first one, using masking tape!!

  I would like you to meet Mr and Mrs Hunt and their little pet Horris. Mr Hunt is an inventor of wondrous things, including their little pet too I think!  Here is how I made their page.


First I cut a cabinet card shape from the Alterations cabinet card die out of a stiff card. It could be a cereal box card as you wont see the back. I then ripped up pieces of masking tape and covered the shape, layering one strip on top of the other slightly to give lots of texture. Burnish it down well with the end of a ruler or bone folder.


Make up the colour of your choice from the Imagination Crafts mica powder kit with the magi bond it comes with, into a wonderful paint and cover your masking tape. You can add a second colour too if you wish. leave to dry.


Cover your page with the Bo Bunny Timepiece collection paper and add your masking tape cabinet card on top.


Add images and embellishments, I chose one of the steampunk clock charms and the Tim Holtz light bulbs which are no longer available at the Fruit Pixie.

 Now I covered a cabinate card shape for this page but you can use this technique on anything you like for cardmaking and scrapbooking. It gives a lovely textured finish and using the mica powder paint has a wonderful two tone sheen too. Why not have a go.

Happy crafting
                           Love Katrina


Tuesday, 26 February 2013

Steampunk book cover

Hi everyone Katrina here, the Fruit Pixies design elf, to show you how I made my Steampunk book cover. So here we go.....

To make my book I used card taken from the Pizza box that the order came in, 2 squares 6.2 x 7 inches and a strip for the spine 7 x 1inches. One of the Tim Holtz Idea-ology ring binders and a selection of the Bo Bunny Timepiece collection 12x12 papers.


Choose the piece of paper you want for your cover and cut a piece 9x12 and 9x4 inches. Place the pieces face down, so the side you want for the cover is on the outside, and place your card covers on top of the paper as shown here. You will have a border all the way around and make sure there is a small gap either side of the spine so the book will open and close. The join needs to be on you back cover so you won't see it in the end. Use a wet glue, I use PVA to stick the paper to the covers making sure you leave the gap between the covers and spine. Leave to dry.


Mite all 4 corners and then using a bone folder or back of you scissors score around the outside of all the covers and fold the paper over. Once folded you then stick using your PVA glue. Leave to dry.


Now we need to put in the ring binder. I found the easiest way was to attach the ring binder to a piece of contrasting cardstock. Cut it slightly smaller then the height of your book and wide enough to be scored as shown, either side of the spine of the book and lap over into the covers so you can stick it in. Once you are happy with the card, attach the ring binder using the brads that come with it and stick the card to the spine of the book using PVA. Once stuck to the spine make sure the creases are in the gaps snugly and stick the overlap to each cover with the book flat.


Next cut 2 pieces of the Bo Bunny paper to cover the inside of your book and stick down. Leave to dry.  That is our book made!! Not too bad was it?


Now the fun bit, decorating. You can decorate it any way you like but here is how I did mine.

 Over the paper on the cover I stamped with a brown ink and a script stamp and used a time template to add some detail. Don't forget the back too.


I then cut one of the Alterations Cabinet card dies shapes from the Bo Bunny paper and used the same stamps and templates to decorate that. I then used the Ranger embossing pad and wiped on some of the ink then added Aged Mahogany distress embossing powder, make sure you shake the tub first. Heated it and then added more where needed until I got the grungy look.


I then cut the different Alterations gear die cut shapes out of Grunge paper, which I then painted, card stock and scraps of the Bo Bunny papers. I then poked them out from behind the cabinet card and stuck them all down. I then added some of the distress embossing powder around the outside of the cover too.


I then took a copper plant label, Hubby is a keen gardener so I pinched a few :), rounded off the other end and ran it through the Tim Holtz texture fades pocket watch and steampunk, then covered it again with Ranger embossing ink and distress powder then heated it. Watch your fingers as it gets very hot!!


I then put it all together using the Alterations Typeface die for the title and added some of the Tim Holtz Idea-ology Sprocket gears. I added a couple of the Creative Expressions Faux screw brads to add the copper pieces to the book.

So there you have it, how I made my Steampunk book. Now all we need is some pages for the inside.

Hope you enjoyed the tutorial, any questions just ask here or on our Facebook page and I 'll try my best to answer them.

 Happy crafting

                              love Katrina

Friday, 1 February 2013

Button Valentine


Hi Katrina here, the resident design elf with another project for you.
 
Sarah-Jane inspried me to create my version of her button heart.
 

   For mine I used a piece of packaging as the base and covered it with a piece of the 7 Gypsies Trouseau papers . I then used some of the wonderful Fruit Pixie buttons, the bright selection, and one of the Romantic word tiles to finish it off, glued on with Imagination Crafts Magi Bond. I then went around the edge of the piece with Tattered Rose distress ink. Quick, easy and fun!

Gloss Resist Tags

I learnt a new technique the other day and had to give it a go and share it with you...
 
 
If you like the resist look then this is for you. You need a template of your choice and Eco Green Artist Medium Gloss ( you can do it with the Matt but ...the gloss works better ) You also need an old credit card type thing to apply the medium and a surface to apply it to.

I decided to make some tags so cut the PaperArtsy Smoothy Card with the Alterations Die Tag & Bookplates Then applied the Artist medium with the credit card making sure all the areas were covered, removed the template and left it to dry. Then something magical happened, when it dried it gave a crackle affect! It must be what the card is coated with!! Looks cool though!

I then used PaperArtsy Fresco Finish Acrylics to colour the background and decorated it with Kaisercraft Miss Match Bingo Cards and Kaisercraft Collectables Miss Match. I filled a Creative Expressions Glass Vials Medium with Imagination Crafts Magi Glitz
Gel - Arctic Frost and tied a tiny White Jewellery Tags and stuck on the tag to finish off. Hope you like it!


The Fruit Pixie design elf here again with the other tag I made using the resist technique I described before. This time I went bright, which is slightly unusual for me but it shows the different effects you can get with this technique.


I used the same as before, a tag cut from the PaperArtsy Smoothy Card and the resist technique that again gave a crackle affect. This time though I used the Cosmic Shimmer Chalk Misters in Yellow, green and blue. I then cut a Alterations tattered flowers die to cut the rose shaped flowers out of Foundations A4 Kraft Twistwrap 10 sheets, which is great fun to play with if you haven't yet tried.
 
To add the colour to the flowers and the Tattered leaves cut from the same paper I used Imagination Crafts Silkies which I love. I then added a button form Sarah's wonderful button collections, added BLOOM using Alterations Die Typeset Alphabet to the leaf and finished off the tag using something very unusual!!


Bet you can't guess what it is?????????
 

Nellie Paper Doll

Happy New Year everyone from me, Katrina the Fruit Pixie design elf!
 Now things are back to normal I am back in my craft room again.

I would like you to meet Nellie my paper doll made from the 7 Gypsies Trousseau collection.


I used a part of the Trousseau Grace paper, the one with all the wonderful pictures on it and then I just used my scraps to make up her clothes.
For the body I used the Artistic Stamper Art doll stamp set, large. This is good to give you a base but you can re cut the shape to fit with what you have in mind. I went for an Edwardian look to match the paper but you can do what ever you want.

Other things I used were - Some small brads for her joints. Imaginations crafts silkies to paint her shoes, I used Turquoise lace from the Persian velvet set. A little bow from the Craftime Enchanted ribbon bows, the little pearls are from the same collection. The flower in her hair is from the brights button collection.
 

    I think that is all. Hope you like her and have a go at making one of your own. Happy crafting, love Katrina

Tuesday, 18 December 2012

Tea - Light Lantern

Hi everyone, Katrina here The Fruit Pixies little design Elf with another Christmas craft idea,so make yourself a cup of tea and grab a mince pie and lets get crafting!

   I have been working again with Craft UK Collage topper sheets again, I used Joy this time.

   This little lantern to use with a tea light but please be careful*, is really easy to make and only uses 1 sheet of card for the lantern itself....


So take the backing card and cut it down to 51/2 x 10 3/8. The place it on the Hougie board and score at 2.5, 5, 7.5 and 10. Then turn the card around and score a line at 1.5, this will be the bottom of the lantern so if you are using a pattern with a top and bottom this needs to be at the bottom. You then need to cut the scored lines up to the 1.5 line you have just scored.

  Now to cut the apertures, use any shaped die that will fit in the panel and cut them out. Place velum on the back of each aperture. Choose the images you like from the toppers and cut them out. I used a little snowflake punch to punch out snowflakes from the waste twinkly card. Fold up your lantern and glue together. Add your images and embellishments and you are done.

      Hope you like it, tell me what you think and better still show me yours!
Happy Christmas crafting, love
Katrina
 
*or you could use a little battery operated one, FP!

Hanging Heart Box


Hi there, Katrina here! OK, More Christmas crafty ideas all the way up to the big day!!
Well a week before then I am off on a dreamed of holiday to the Christmas markets in my second home, Austria.

   So, I have been playing with the Craft UK collage sheets for this idea. They come with diecut toppers and a sheet of extremely good quality cardstock that matches the toppers. 


  This little hanging heart box is easy to make. I drew a heart shape and cut it out twice. Then to make the box sides I cut a strip of card about 2 inches wide and then score 2 lines down the length of your card then fold in half horizontally to fit in the bottom of your heart. To make the point cut along the half fold to the long fold lines, fold it up and stick to one side of the heart then stick the other heart on top, add your topper and embellish. Add something to hang it up.

              Hope you like it, love Katrina

Quick & Easy Christmas Cards

Quick and easy Christmas cards
Hi there Katrina The Fruit Pixies little designing elf here with some quick and easy Christmas cards you can make with the Craft UK Die Cut Collage Sheet sets.
 
They come with a sheet of die cut folded toppers and a sheet of really good quality cardstock. These are perfect for quick and easy cards and other projects.
 
 Of course every Christmas project has to have a touch of glitter and the best glitter glue I have ever used is Imagination Crafts Magi Glitz Gel - Arctic Frost If you have never tried it add it to your next order and give it a try, you won't be dissapointed!


The card is such good quality I was able to make a sweet little box too.


Tuesday, 6 November 2012

Phone charms not just for phones!!

 I love to use these phone charm clips for all sorts of things except hanging from my phone, no hole.


I use them to identity my memory stick, hang from zips, all kinds of things and these cute little God beads are ideal to hang from the end. I mixed them up with some handmade paper beads made with scraps of the Ruby Rocket kit which matched perfectly.


Or the word tiles look good on the end of them and of course the pendant I made in my last melt pot session was also the right size.


These would make great cracker prizes or just a little gift to pop in with a Christmas card. What will you hang from yours?????