Showing posts with label Cosmic Shimmer. Show all posts

Friday, 1 February 2013

Gloss Resist Tags

I learnt a new technique the other day and had to give it a go and share it with you...
 
 
If you like the resist look then this is for you. You need a template of your choice and Eco Green Artist Medium Gloss ( you can do it with the Matt but ...the gloss works better ) You also need an old credit card type thing to apply the medium and a surface to apply it to.

I decided to make some tags so cut the PaperArtsy Smoothy Card with the Alterations Die Tag & Bookplates Then applied the Artist medium with the credit card making sure all the areas were covered, removed the template and left it to dry. Then something magical happened, when it dried it gave a crackle affect! It must be what the card is coated with!! Looks cool though!

I then used PaperArtsy Fresco Finish Acrylics to colour the background and decorated it with Kaisercraft Miss Match Bingo Cards and Kaisercraft Collectables Miss Match. I filled a Creative Expressions Glass Vials Medium with Imagination Crafts Magi Glitz
Gel - Arctic Frost and tied a tiny White Jewellery Tags and stuck on the tag to finish off. Hope you like it!


The Fruit Pixie design elf here again with the other tag I made using the resist technique I described before. This time I went bright, which is slightly unusual for me but it shows the different effects you can get with this technique.


I used the same as before, a tag cut from the PaperArtsy Smoothy Card and the resist technique that again gave a crackle affect. This time though I used the Cosmic Shimmer Chalk Misters in Yellow, green and blue. I then cut a Alterations tattered flowers die to cut the rose shaped flowers out of Foundations A4 Kraft Twistwrap 10 sheets, which is great fun to play with if you haven't yet tried.
 
To add the colour to the flowers and the Tattered leaves cut from the same paper I used Imagination Crafts Silkies which I love. I then added a button form Sarah's wonderful button collections, added BLOOM using Alterations Die Typeset Alphabet to the leaf and finished off the tag using something very unusual!!


Bet you can't guess what it is?????????
 

Thursday, 4 October 2012

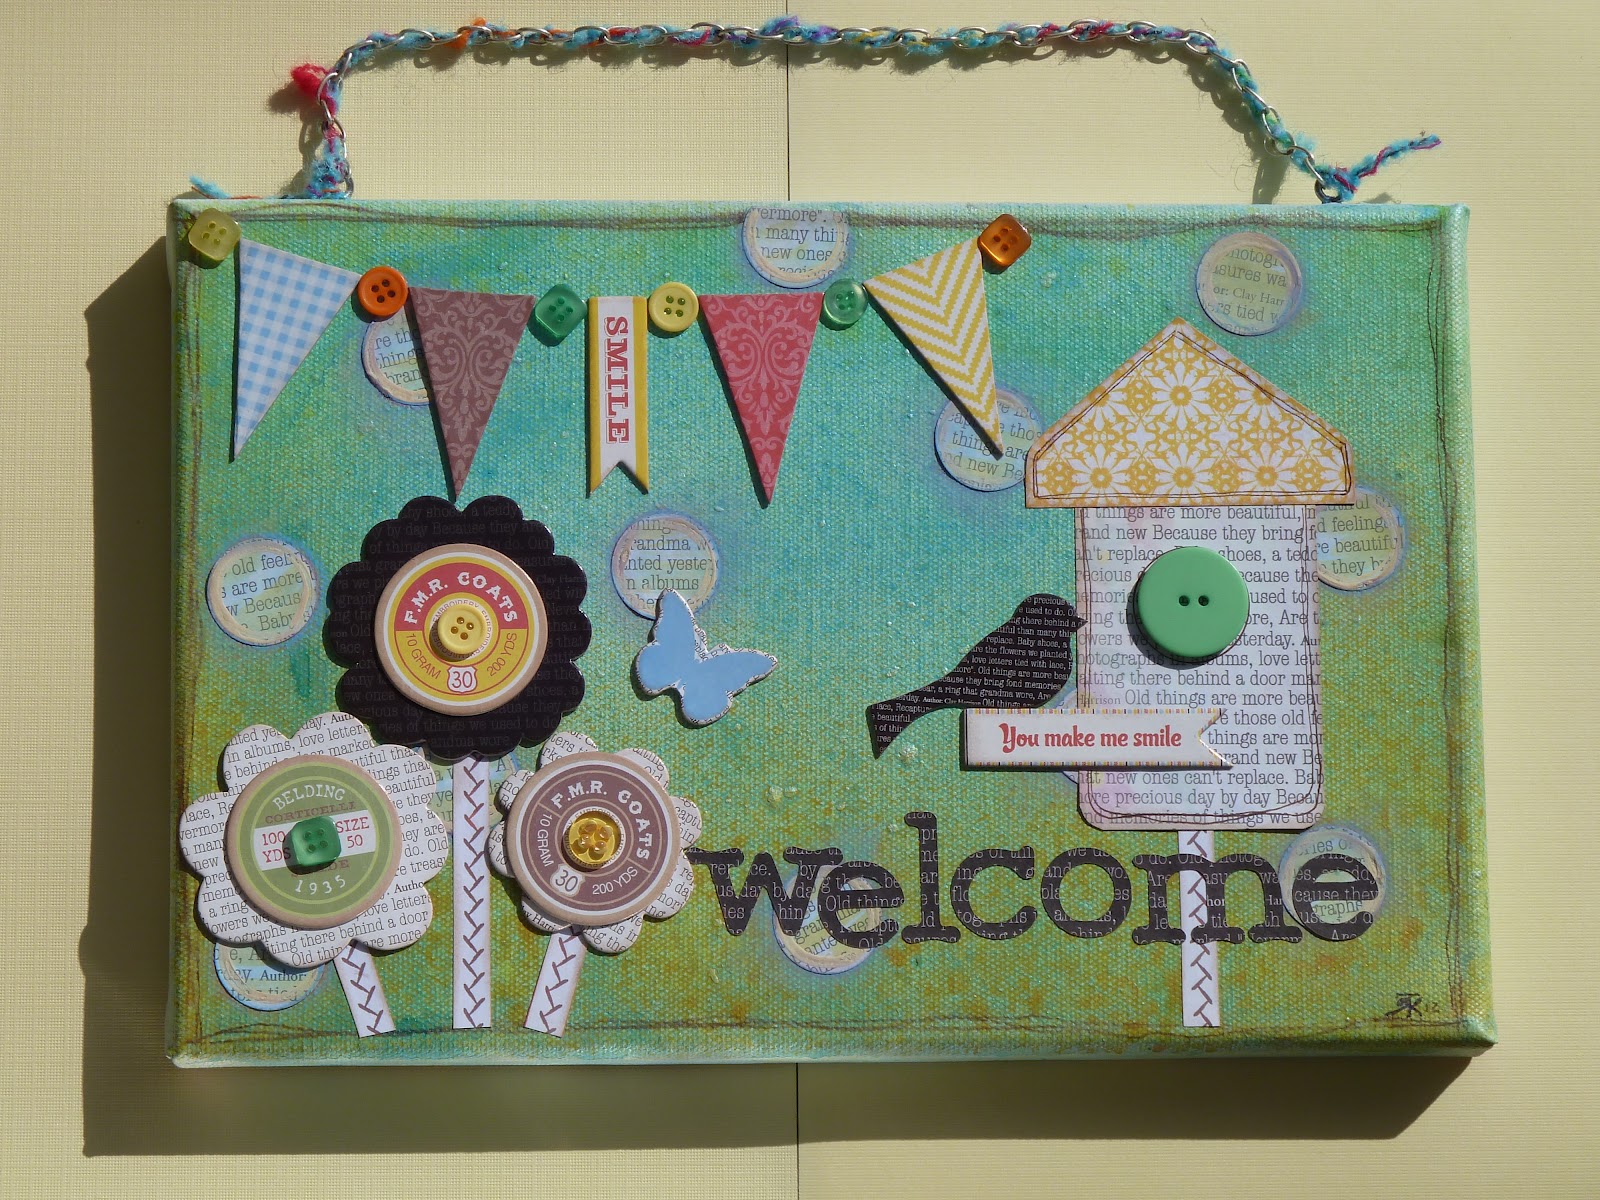
Canvas Welcome Sign


Hi everyone, Katrina here from the design team.
 
 
As you can see I have been playing again with the Ruby Rocket Nostalgia collection. This time I teamed it up with the Cosmic Shimmer chalk misters, they were made for each other and a 12x8 canvas to make a welcome sign.

   The bare canvas was sprayed with the following colours of misters - Pastel Orange chalk mist, Pastel Blue chalk mist, Pastel yellow chalk mist and then to give it a bit of shimmer the Egyptian blue vintage mist. I also sprinkled a tiny bit of Cosmic Shimmer Mica Pigment Pearlescent powder.


Once that was dry I played about with the chip board pieces from the Ruby Rocket Nostalgia Collection Pack and some buttons form the Button Assortment Halloween which are just the right colours untill I was happy with the look. The stems and bird house along with the welcome word is cut from some of the paper in the pack but everything else is in the chip board pack.


To finish the sign off I added Bead Cafe Large Link Silver Chain and threaded some wool I had through it to soften it a bit and its ready to hang in the hall and welcome all my visitors!


Hope you like my sign, why not give it a go yourself, they would make great presents for Christmas ( I know I said the "C" word but its getting very close now )
 
What ever you are making happy crafting! love Katrina


Thursday, 9 August 2012

Alice in Wonderland

Hello, Katrina here. I have been re visiting my love of stamping using the lovely IndigoBlu Alice stamp plates. I especially likes the original art from the book. I was also playing with the Cosmic shimmer chalk mists, if you are not a fan of the sparkle you get with the mica sprays or want a different look then give these a go, I love them and they went so well with the stamps.
Tea Party Alice Card


I used -
* Cosmic Shimmer Chalk Mist Pastel Blue
* Cosmic Shimmer Chalk Mist Pastel Pink
* Cosmic Shimmer Chalk Mist Pastel Purple
* 25 Craft UK A5 Card Blanks White
* IndigoBlu Rubber Stamp Plate Alice 2
* IndigoBlu Rubber Stamp Plate Alice 1
* Craftime Enchanted Paper Flowers
* Craftime Enchanted Pearl Gems
* Creative Expressions Bakers Twine Black & White 50 Yds
* edging die or punch
* Pages from Alice in wonderland
1. Use the chalk mists to spray a piece of A4 card, dry in between colours.
2. Stamp the image of Alice at the Tea party and Alice in Wonderland onto white card, cut out and mat onto black card, cut a small border. Cut or punch your border top and bottom of a mat cut from your misted card. Mount Alice onto it.
3. Cover the front of your card with the pages of your book and ink around the edges. Tie a piece of the Bakers twine around the card.
4. Cut out the Alice in Wonderland and ink around the edges.
5. Use 3D tape to attach the main image to the card and add some flowers and the Alice in wonderland, add gems to the flowers middles and you are done!
 
Sorry it's late card

My next card is a little sorry its late card. We all miss a birthday now and again and this little card is just so cute, I'm sure they will forgive you!!
I used -
* Part of the card you misted for the first card
* IndigoBlu Rubber Stamp Plate Alice 2
* Artistic Stamper Time & Keys A5 Plate
* Plain white card
1. Cut your card blank from the card and stamp the Alice Stamp image with the watch and some clock images from the time stamp plate along with the late saying and cut them all out.
2. Cut a piece of the sprayed card to fit your card and stick down. Ink around the edges.
3. Arrange all the images on the page and once you are happy stick down.
4. Cut sorry from a die cut alphabet or use sticker and your done!
Rabbit tag
 
I just had to use the rabbit image and so made up this little tag.
I used -
* IndigoBlu Rubber Stamp Plate Alice 2
* IndigoBlu Rubber Stamp Plate Alice 1
* Card you misted for the first card
* Bakers twine
1. Cut the misted card into a tag shape
2. Stamp the rabbit and cut him out, stamp curiouser and curiouser and cut out too.
3. Arrange and stick on your tag.
ATC
And lastly I made a little ATC using the Tweedledum and Tweedledee image and the rhyme from the book. Its amazing how far 1 A4 sheet of card will go.
 
All these from just 1 A4 sheet, promise!!

Monday, 23 July 2012

Olympic Record Book & UTEE Pendants

If you saw the fabulous record book & Pendants Katrina posted on Face book and have been waiting patiently for the full instructions here they are...finally!

I used -
* Bare Chipboard Album Tabbed
* Eco Green Acrylic Paints - Green patina, Gold, silver and bronze
* Vintedge Collection Pack
* Vintedge Paper Twine 15yds
* Craftime Britannia Ribbons
* Exquisite Pigment Ink - Lapis
* Craftime Britannia Laser Mesh Sheets

How I made my book -
1. Use the fantastic paint to paint your book. I used the green patina for the covers and the back page then used the gold, silver and bronze for each of the tabs. Leave to dry,
2. Trim the papers down to fit your pages. If you like the inky look, ink around the edges with the Lapis ink and the to add the dotty pattern apply ink with a sponge through the mesh sheets in a random way.
3. For the front cover I used a image from the collage sheet paper from the collection pack along with the word London. I cut the other words with my Cricut but you could use any letters you like.
4. On the back page I used an off cut of paper to make a pocket to add any keepsakes. Put you book together and add the ribbons to the book rings.


So now you can make it your own, my plan is to add the medals won as they happen to the appropriate page and use the other pages to add memories and journalling along the way. But you could add pictures and journalling of how you celebrated the year the Olympics came to London.
 
 
UTEE Pendants


Before we start just a bit about the difference between normal embossing powder and UTEE (Ultra thick embossing enamel). Embossing powder, which is very fine granules, like powder is usually used on top of a stamped image, although there are lots of other things you can do with them. The granules are fine enough to stick to the ink and keep the fine stamped lines of the image. They are then heated with a heat gun and melt into a raised line. With UTEE the first thing you will notice is it has much larger granules, like sugar. So not good for using over a stamped image but great for melting and pouring into shapes and covering large areas. Again there are lots of ways to use it and things to make with it. If you have any questions just ask but do have a play with them, they are such good fun. Just watch your fingers as they get very very hot!!

So here is how I use UTEE in my melt pot. If you don't have a melt pot you can still use UTEE. You will need a heat gun, a hair drier won't do the job as it blows air and will just blow your powder all over your table and also its just not hot enough. You can hold the little pie trays with a wooden peg, the tray gets very hot, and use your heat gun to heat from the bottom till the powder melts. If you have a melt pot though get it out, heat it up to UTEE -

I used -
* Melt Art Texture Treads Mod Circles
* Imagination Crafts Magi Boss Chunky Mother of Pearl
* Cosmic Shimmer Malachite Fire 20ml UTEE
* Metal pie trays, the small ones
* Wooden cocktail stick
* Wooden peg
* Melt pot or heat gun
* Mould of some sort like a small cookie cutter or as I used the plastic inside of a roll of tape!
1. Put the powder into a little pie dish
2. Place the pie dish into the melt pot. You can just pour the powder into the melt pot but then you have to clean it out and you can only melt one powder at a time. This way you can get 3 pie dishes in, just. Pop the lid on and wait till it melts.
3. In the mean time decide where you wish to pour on the Texture tread and place your mould over the area.
4. Once the powder is molten carefully pop a wooden peg onto the dish as a handle and pour the molten powder into the mould to cover the bottom.
5. As quickly as you can put a cocktail stick into the top of your mould if you want to use it as a pendant and leave to cool.
6. Remove from the texture tread and push out of your mould. Then make some more!!
7. If you don't like the way it turned out just throw it back in to the tray and re melt it and pour it again, the same with any little bits you get, just throw them back in the dish. Once you have finished leave all the dishes to cool, stack them on top of each other and store. When you want to play with them again jut pop the dish with the solid UTEE onto the hot melt pot and off you go again. You can of course mix your powders and molten powder together if you like.

The examples were all made this way, the top 3 were made with the mould, the one on the bottom in the middle is a piece of sequin waste punched out with a circle punch and put at the bottom of the mould then the mother of pearl poured over the top. The gold and blue ones at the bottom were just poured free hand straight onto the texture tread.
I know the texture treads are an investment but other ideas of how to use them coming up!