Showing posts with label Buttons. Show all posts

Saturday, 18 May 2019

1960 metal buttons just finish a project off

Hi, design elf Katrina here to show you my latest project.

    As well as paper crafting I also love to sew. I love to dress make mainly but I also love the challenge of making something from scratch without a pattern. 

     We had just bought a new tablet for hubbies photos and it needed a cover or something to protect it. So I made it a quilted cover. I was pleased with how it looked but it just needed something to finish it off. I knew just the thing!!

      One of my favourite things in the shop are Sarah -Janes buttons. Especially the vintage ones. She has some beautiful silver metal buttons from the 1960s and I love them. So I stitched one on and that finished it off beautifully.


The detail on these buttons is lovely 


You can find them in the shop here 
Do have a look, there are some lovely 1950s glass ones too.

Well, until next time, happy crafting!
Love Katrina


Wednesday, 18 July 2012

£1 Button Assortments...

Our £1 Button assortments are always popular, 30g for only £1.

It is a random assortment so you never know what you are going to get!

We have a couple of  new colourways...


...and the return of old favourites

Sunday, 13 May 2012

Alterations Card

I have been in my craft room playing with all the wonderfull Fruit Pixie things and came up with this sewing themed card.

  I used -
* A6 card blank
* Texture Fades Pattern & Stitches
* Alterations Die Sewing Room
...* Tim Holtz Distress Ink Pad Tea Dye
* Craftime Britannia Printed Dresses
* Button Assortment Britannia
* 60" Tape Measure
* Creative Expressions Bakers Twine Black & White 50 Yds
* 12 Assorted Safety Pins Brass
* Scrap of patterned paper
* A couple of pins from my pin cushion

 How I put it all together -
1. Run the card through your machine with the embossing folder.
2. Using distress ink bring out the embossed image on the card by rubbing the ink gently onto the card using the application tool.
3. Cut your patterned paper into a square using pinking sheers or decorative scissors.
4. Place one of the stich pattern embossing folders down the right hand side of the paper square and run it throught your machine. Sand lightly.
5. Draw or, as I did, draw around a card bobin you get to keep embrodiary thread or use the Alterations Die Sewing Room to cut your bobbin out. Wrap the butchers twine around it and secure.
6. Make 2 small holes and attach your safety pin to the paper. Stick the pattern paper to your card front using, use a wet glue because of the embossed surface.
7. Stick your tape measure to the card and trim off. Poke the pins into your bobbin and add it to the front of your card with the dress shape and 3 buttons and leave to dry.
 

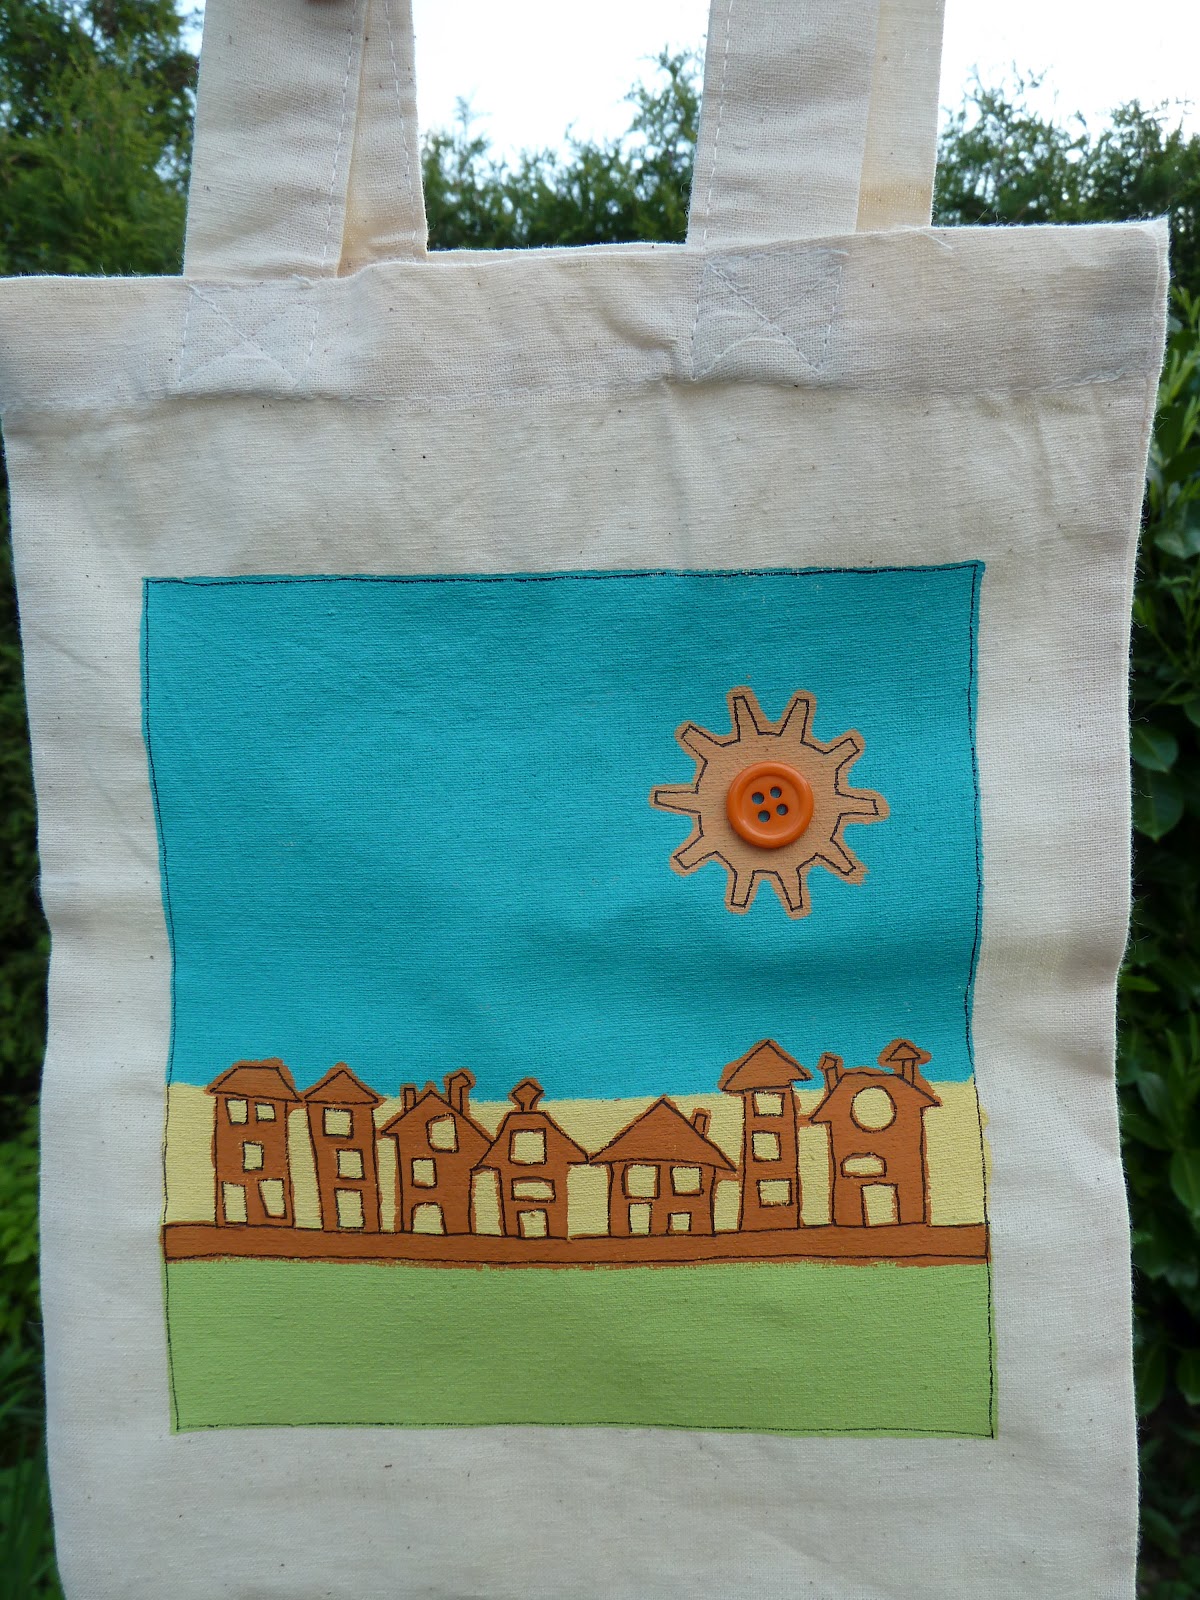
House Bag & Spotty Bag

House Bag

Take 1 Eco cotton bag and cut a piece of stiff card, like cereal box card , and cover it in a plastic bag. Place this inside the canvas bag to prevent it sticking together.
Using masking tape tape off your design area and the horizon at the bottom of your sky.
Make sure it is all well stuck down. Paint the sky with Eco Green Acrylic paint ( I used waterfall ) Leave to dry. Then tape off the top of the grass leaving a gap between the sky and grass.
Paint this with Eco Green Acrylic paint ( I used Lime for this ) leave to dry.
Then paint the in between bit, you could use something like stone.
Using the Tim Holtz Alterations Town scape die cut out a piece of funky foam and stick onto a piece of clear packaging. Do the same with the Tim Holtz Alterations Gadget gears, the small one.
Remove the horizontal tape from your bag, add paint to the townscape stamp ( I used pumpkin ) and stamp onto the bit in between the sky and grass. Do the same with the small gear stamp with the same colour to make the sun.
Fill in any missed bits with a paint brush and leave to dry. Remove all the tape and using a permanent black marker pen outline the houses, sun and around the whole design, don't worry about wobbly lines it all adds to the look of your bag.
Select a button from the brights button bag and stick to the middle of the sun using Imagination crafts magi bond. Once the glue is dry remove the card and you are ready to go shopping!!


Spotty Bag

Spotty canvas bag

Take 1 Eco Cotton bag and using masking tape, tape off the area you wish to paint making sure it is well stuck down.
Cut some stiff card, like a cereal box, to the size of your bag and put that into a plastic bag. Place this inside your canvas bag to prevent it sticking together.
Paint your background colour in using the Eco Green Acrylic paint ( I used Lime ) and leave to dry.
Use a circle punch or die punch a circle out of funky foam and stick that to a piece of clear packaging to form your own foam stamp.
When the background is dry paint your circle stamp with a different colour Eco Green Acrylic paint ( I used Raspberry ) and stamp onto your bag, you may have to fill in the little bits the stamp misses free hand. Leave that to dry.
Select buttons from the button assortment packs ( I used the brights ) and stick to the middle of the circles with Imagination crafts magi bond, this has the best tiny nozzle I have ever used.
Once everything is dry remove the tape and card from inside and you are done!!

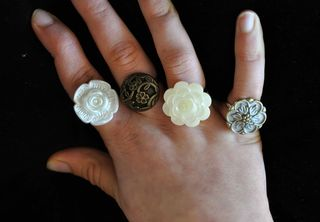
Button Rings

A quick and easy project, perfect for using up your button mountain. You will need; a glue gun, ring blanks and assorted buttons.


The instructions are VERY complicated; Use glue gun to attach buttons to ring blanks....Ta Da!!

For a more child friendly version glue dots could be substituted, but I'm not sure how permanent a fix it would give. I've used Tim Holtz buttons here for a 'Pilgrim' type ring but you could recycle old & vintage buttons or whatever you have to hand and even layer them up.


Beautifully modelled by my amazing daughter Kate


Thanks also go to Kate for loaning me her fabulous Nikon D90 and editing the photos on her equally fabulous MacBook Pro.


Button Hearts & Tissue Flowers

More projects from Katrina...
Button Hearts, fabulous for using up all those buttons you've been hoarding for years in tins and jars.
Brights Button Heart

Pastels Button Heart

I have seen these in shops and they are quite expensive but very easy to make. I used the button assortment bags in pastel and brights. I like to lay my buttons out in a heart shape so I know I have the right number for the size heart I want. Cut a double length of wire that is longer then the size heart you wish to make, fold in half. Thread the wire through the button you want for the dip in the top of your heart, I have used a flower button for this, if you have buttons with 4 holes use holes diagonal to each other to thread the wire through. Once the button is threaded to almost the end of the wire, you need to leave a bit to finish it off with, squash it flat, this locks it onto the wire. Thread the next button onto the wire, leave a small gap and squash that one down to lock it onto the wire. Twist the second button around a couple of times to give the wire between the first and second button a nice look. Carry on with this until you have all the buttons onto the wire, don't worry about the shape yet. You now need to make a circle out of your buttoned wire and finish off by twisting the end wire around each other to secure it, if you want to hang it by a ribbon make a little loop with the remaining wire at the back of the button. Now you have a circle you can bend the circle of buttons in to a heart. These would look great on the front of a card or just add a ribbon and they make great little gifts.

Tissue Paper Rose

Tissue Paper Rose

Spritz some white tissue with Inkylicious Sprinky colourz, I used the raspberry, leave to dry and then cut out 3 different size circles. You can do it with punches, dies or even free hand. Scrunch them all up and then pile up on top of each other and attach together with a brad, mine is from the Dovecraft Funky brads fantasy set. To finish off the flower, tweak the petals until you have the look you like. You could then add glitter or beads to glitz them up if you like.

Saturday, 12 May 2012

Happy Valentine's Day

Happy Valentine's Day
Here is the Valentine headed for Mr. FP when he gets up from the night shift and before he heads out for the afternoon shift.

A mixture of vintage and new buttons and bits and bobs placed in a higgeldy piggeldy vague heart shape, on a 6" x 6" Black card and finished with an appropriate word tile. The '9' Bingo number is for the number of years we have been maried.