Showing posts with label PaperArtsy. Show all posts

Friday, 1 February 2013

Gloss Resist Tags

I learnt a new technique the other day and had to give it a go and share it with you...
 
 
If you like the resist look then this is for you. You need a template of your choice and Eco Green Artist Medium Gloss ( you can do it with the Matt but ...the gloss works better ) You also need an old credit card type thing to apply the medium and a surface to apply it to.

I decided to make some tags so cut the PaperArtsy Smoothy Card with the Alterations Die Tag & Bookplates Then applied the Artist medium with the credit card making sure all the areas were covered, removed the template and left it to dry. Then something magical happened, when it dried it gave a crackle affect! It must be what the card is coated with!! Looks cool though!

I then used PaperArtsy Fresco Finish Acrylics to colour the background and decorated it with Kaisercraft Miss Match Bingo Cards and Kaisercraft Collectables Miss Match. I filled a Creative Expressions Glass Vials Medium with Imagination Crafts Magi Glitz
Gel - Arctic Frost and tied a tiny White Jewellery Tags and stuck on the tag to finish off. Hope you like it!


The Fruit Pixie design elf here again with the other tag I made using the resist technique I described before. This time I went bright, which is slightly unusual for me but it shows the different effects you can get with this technique.


I used the same as before, a tag cut from the PaperArtsy Smoothy Card and the resist technique that again gave a crackle affect. This time though I used the Cosmic Shimmer Chalk Misters in Yellow, green and blue. I then cut a Alterations tattered flowers die to cut the rose shaped flowers out of Foundations A4 Kraft Twistwrap 10 sheets, which is great fun to play with if you haven't yet tried.
 
To add the colour to the flowers and the Tattered leaves cut from the same paper I used Imagination Crafts Silkies which I love. I then added a button form Sarah's wonderful button collections, added BLOOM using Alterations Die Typeset Alphabet to the leaf and finished off the tag using something very unusual!!


Bet you can't guess what it is?????????
 

Sunday, 13 May 2012

Lynne Perrella Frame

I just love the new stamps from Paper Artsy Lynne Perrella and using one of my favourite techniques I came up with this frame. The frame came from the £1 shop but any frame with a deep surround will be fine.
 I used - PaperArtsy Lynne Perrella Collection LPC003
Fresco Finish Acrylics - Toad Hall
Crackle glaze
Honey dew
... London night
Tim Holtz distress ink
Template of your choice
White tissue paper
Black ink pad, one that drys on glossy surfaces
PVA glue
To alter your frame -
1. Remove the glass and rub the wood down with sandpaper and wipe off the dust. I gave my frame a coat of gesso but you don't have to. Paint the frame with the Toad Hall acrylic and leave to dry. Apply the crackle glaze with an old credit card or similar thing, if you have nothing like that just add a thin layer with a paint brush. Leave to dry or dry with a heat tool. Paint over the Honey dew and watch it crack!! Leave to dry.
2. Using your chosen template sponge through your distress ink using a piece of cut and dry.
3. Stamp out a variety of your images from the Lynn Perrella stamps on to tissue paper and once dry tear around then as close as you dare. Decide where they are all to go and then carefully, I find it easiest to use my finger, cover the backs of them with PVA glue and gently pat them into place. Leave to dry.
4. Apply some London night around the edges of your frame and once dry put your frame back together and its ready for a photo!
For close ups of the frame see Katrina's Blog

Britannia Card

Katrina here, I have been playing with some of the new Colour Connection products.
Glitter card is not what I usually use in my work but always up for a challenge I gave it a go and came up with this card.

  I used - Craftime Britannia Glit...ter Sheets
Craftime Britannia Handcrafted Roses
Craftime Britannia Pearlised Cards
Craftime Britannia Tags & Ribbons
Craftime Britannia Trinket Box
PaperArtsy Fresco Finish Acrylics - London night


  To make the card -
1. Cut the glitter card up into strips to make up the Union flag, glue the first layer to one of the blue pearlised cards then build them up using silicone glue, leave to dry.
2. Using sand paper rub the glitter card back as much as you like and then apply the acrylic paint, I used my finger, to antique it.
3. Take one of the tags and using PVA glue and a tooth pick build up little flowers using the beads and sequins in the trinket box, draw a border around the tag with a red glitter pen. Leave to dry.
4. Once everything is dry stick, again using silicone, one of the roses to the middle of the card and poke the top of the tag underneath to secure and your card is done! Have fun!!

House Bag & Spotty Bag

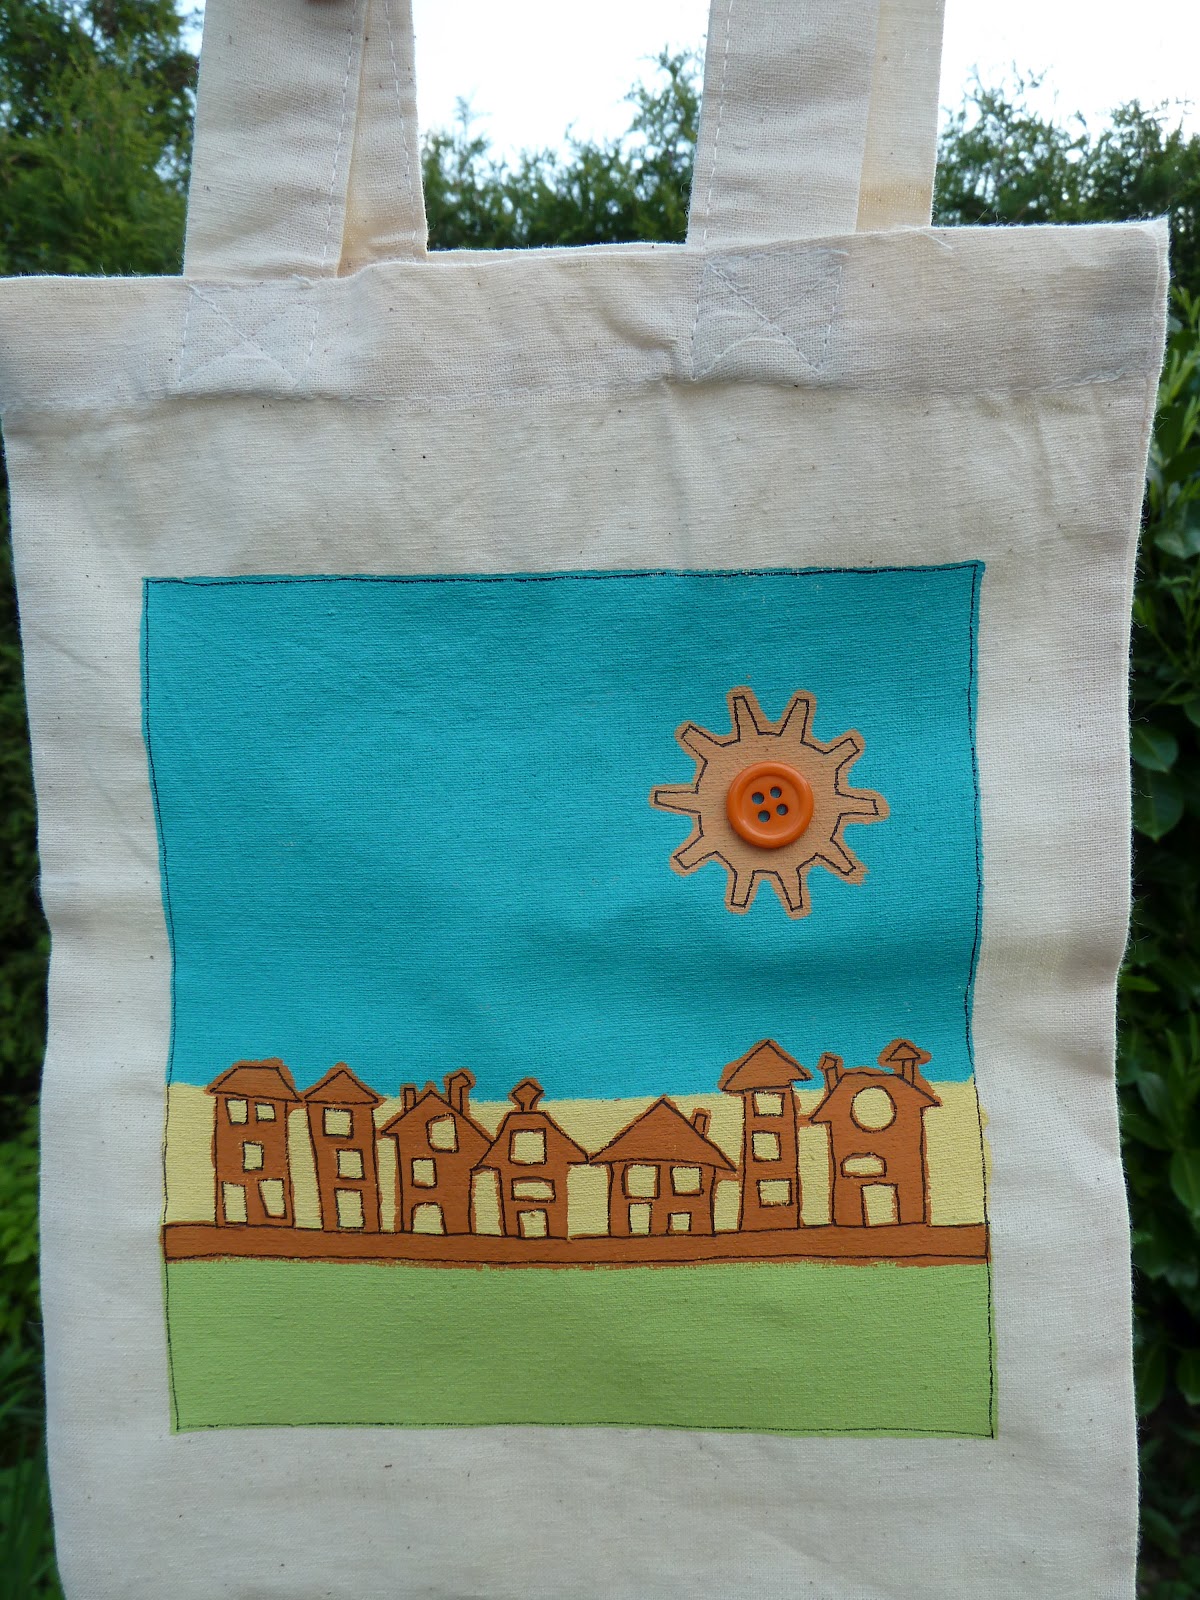
House Bag

Take 1 Eco cotton bag and cut a piece of stiff card, like cereal box card , and cover it in a plastic bag. Place this inside the canvas bag to prevent it sticking together.
Using masking tape tape off your design area and the horizon at the bottom of your sky.
Make sure it is all well stuck down. Paint the sky with Eco Green Acrylic paint ( I used waterfall ) Leave to dry. Then tape off the top of the grass leaving a gap between the sky and grass.
Paint this with Eco Green Acrylic paint ( I used Lime for this ) leave to dry.
Then paint the in between bit, you could use something like stone.
Using the Tim Holtz Alterations Town scape die cut out a piece of funky foam and stick onto a piece of clear packaging. Do the same with the Tim Holtz Alterations Gadget gears, the small one.
Remove the horizontal tape from your bag, add paint to the townscape stamp ( I used pumpkin ) and stamp onto the bit in between the sky and grass. Do the same with the small gear stamp with the same colour to make the sun.
Fill in any missed bits with a paint brush and leave to dry. Remove all the tape and using a permanent black marker pen outline the houses, sun and around the whole design, don't worry about wobbly lines it all adds to the look of your bag.
Select a button from the brights button bag and stick to the middle of the sun using Imagination crafts magi bond. Once the glue is dry remove the card and you are ready to go shopping!!


Spotty Bag

Spotty canvas bag

Take 1 Eco Cotton bag and using masking tape, tape off the area you wish to paint making sure it is well stuck down.
Cut some stiff card, like a cereal box, to the size of your bag and put that into a plastic bag. Place this inside your canvas bag to prevent it sticking together.
Paint your background colour in using the Eco Green Acrylic paint ( I used Lime ) and leave to dry.
Use a circle punch or die punch a circle out of funky foam and stick that to a piece of clear packaging to form your own foam stamp.
When the background is dry paint your circle stamp with a different colour Eco Green Acrylic paint ( I used Raspberry ) and stamp onto your bag, you may have to fill in the little bits the stamp misses free hand. Leave that to dry.
Select buttons from the button assortment packs ( I used the brights ) and stick to the middle of the circles with Imagination crafts magi bond, this has the best tiny nozzle I have ever used.
Once everything is dry remove the tape and card from inside and you are done!!

Stamped Candle

Stamped candle

Use a cheap candle for this, the expensive ones don't work so well.
Stamp the birds in grass from the PaperArtsy Hotpick 1005 plate onto some white tissue paper.
Tear around your stamped image and lay onto your candle.
Wrap greaseproof paper around your candle and hold tight, this holds your tissue in place.
Take your heat gun and gently heat over the image.
You will notice the image will appear clearer through the greaseproof paper this is when its time to move on.
When you have covered the whole image gently peel off the greaseproof paper.
The tissue paper should of compleatley disapeared into the candle.
Wrap some raffia around the candle and tie a knot, add a safety pin and you are finished.

Birdsong Card

Birdsong card

Spray an A4 sheet of card with Inkylicious Lime and one using Raspberry.
Cut out the die cut bird using the PaperArtsy songbird die from the Raspberry coloured sheet.
Stamp the bird image from PaperArtsy Hotpick plate 1005 onto the die cut.
Cover the front of your card with a piece from your Lime coloured card.
Stamp some swirls along the top with brown ink and the grass stamp and seed head along the bottom. Glue your stamped bird die cut onto your card then stamp the word song onto a scrap of the Raspberry card and cut out.
Stamp the word bird onto the card and glue the cut out bird word underneath.
Finish by stamping the little lable stamp onto the front and if you like the look run a pen around the card edge.

Seed head card

Seed head card

Spray a piece of white A4card with Inkylicious lime and then one of the raspberry colour.
Cover the front of your card with the raspberry coloured card and then cut a piece of the lime coloured card slightly smaller than your card size.
Stamp around this piece with the swirl from the PaperArtsy Hotpick plate 1005 in a light coloured ink. Stamp the seed head from the same set in the middle in a copper ink.
On another piece of lime coloured card stamp the filmstrip, again from the same plate, in the same ink and cut out.
Add a greeting to the middle of the filmstrip image and then layer up your card to finish.