Showing posts with label Steampunk. Show all posts

Saturday, 23 March 2013

Steampunk technique book page #5

Hi There Katrina the Fruit Pixie design Elf here with the last page in my Steampunk technique book. For this page we are going to emboss and paint good old kitchen foil.


   Here is my step by step instructions for making my page but you can use this technique for any project you like.


  1. Emboss your kitchen foil using the Tim Holtz alterations steampunk embossing folder. It embosses beautifully!


2. Using a wet glue stick it to a cardstock page and leave to dry. Then paint it with metallic acrylic paint and leave to dry.

 3. Choose a piece of the Bo Bunny Time piece paper and tear it in half. Then tear part of the middle out so it fits you page with a gap in the middle for the foil to show through.


4. Choose the stamp you like from the Artistic Stamper time key stamp plate and stamp them on to the Bo Bunny Timepiece paper in a random pattern using a VersaMark ink. Gently brush the Imagination mica power over the VersaMark stamped image.
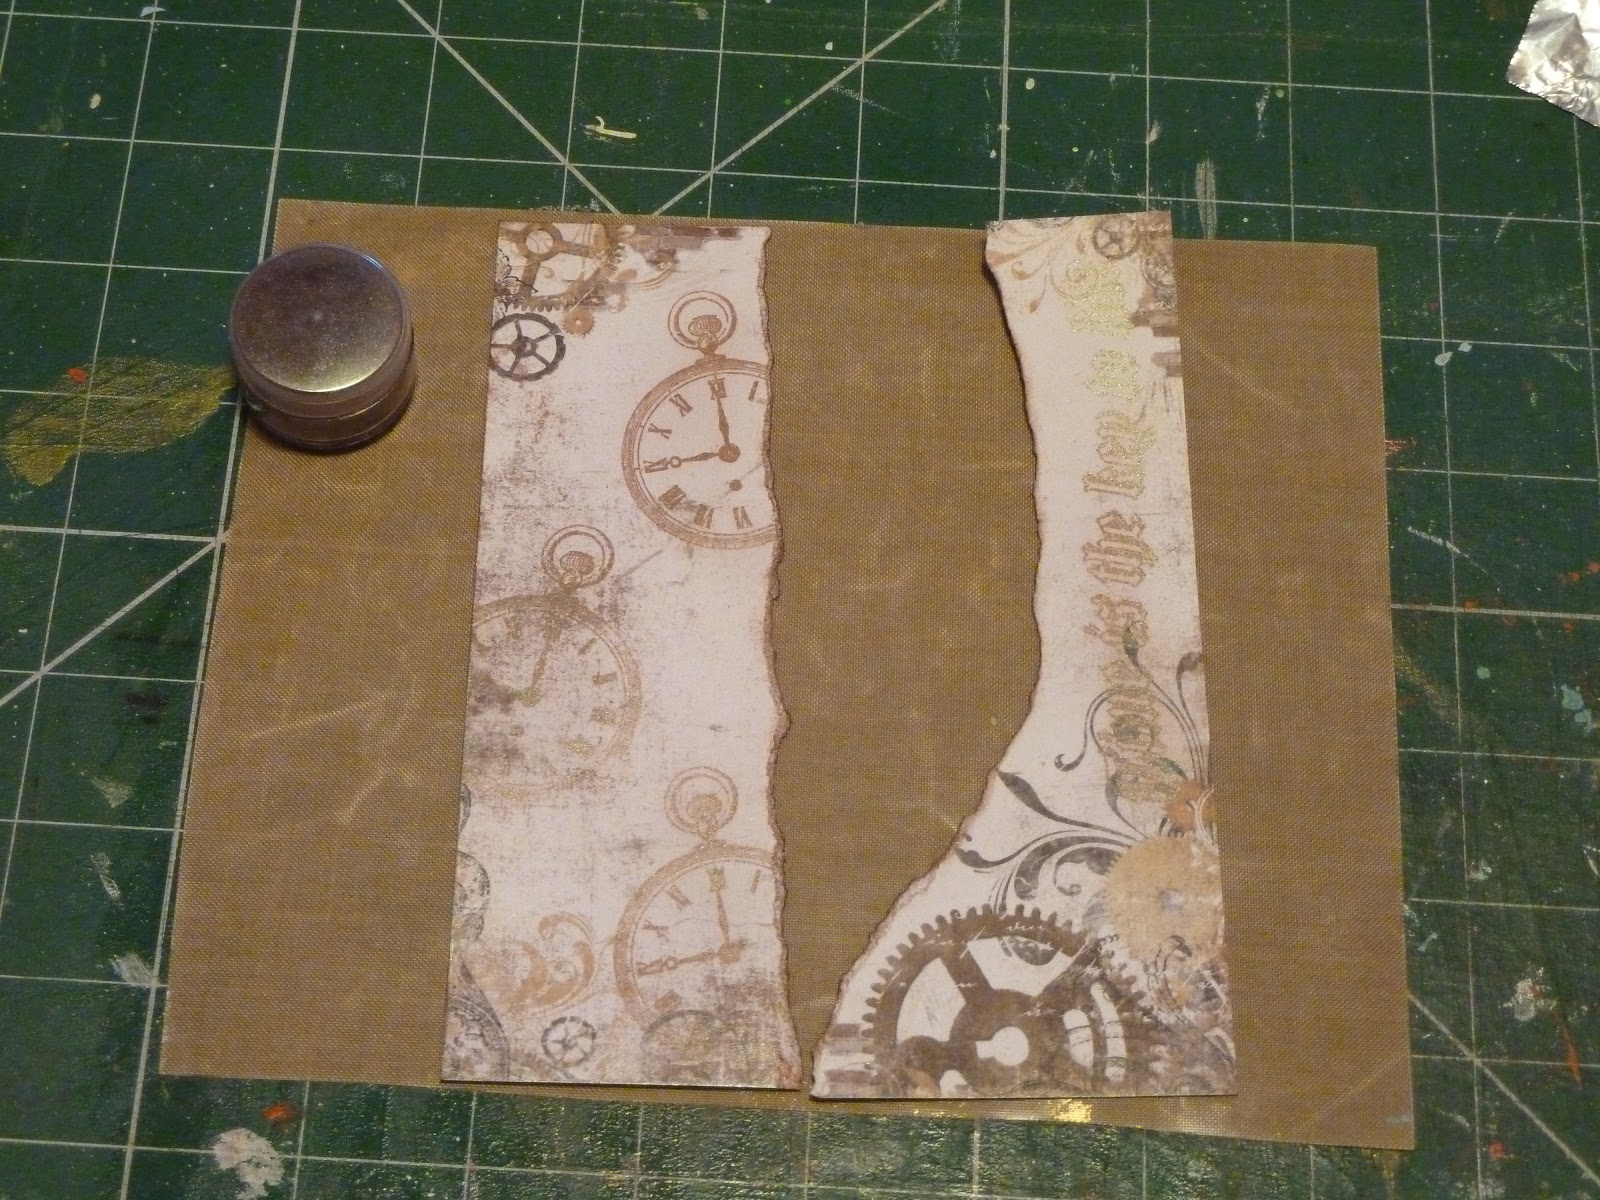

5. I stamped watches on one side and a phrase on the other in the same way.
6. Then stick your paper onto your foil and embellish as you wish. I painted an Eco Green chipboard cog with the same metallic paint and added one of the Bo Bunny trims. The large crystal in the middle of the cog also comes from the Bo Bunny trims.
This is the last page in my Steampunk technique book. I hoped you enjoyed them and picked up something new along the way. Have fun with all these techniques and make them your own.
Happy crafting,
                               Love Katrina

Tuesday, 19 March 2013

Steampunk technique book page#4 embossing folders

Hi there, design elf Katrina here with the penultimate page in my Steampunk technique book. This time using your embossing folders in a slightly different way.

Here is how I achieved my look


Place your embossing folder, I used the Tim Holtz Pocket watch and Steampunk texture fade for this page but any embossing folder will do, place under your chosen Bo Bunny Time piece paper.


Using a wax crayon, I used 2 different colours, rub over the paper and you will pick up the texture pattern from the embossing folder underneath


Then add your ephemera. I used a scrap of music paper and gramophone paper but you could do this technique on any card or scrapbook page.

Happy crafting!
                                     Love Katrina

Friday, 15 March 2013

Steampunk page #3 stamping

Hi there Katrina the design Elf here with my 3rd Steampunk page to show you and this time the technique is stamping.

   Now I do have a bit of a confession to make, I got so carried away with this page I totally forgot to take any photos along the way but I will talk you through the process instead.


  OK here is how I did it.

1. I took a piece of Crafthouse Press Watch face paper and a paper for the back, cut them both at the same time using the Tim Holtz alterations cabinet card die. Then keeping them together cut to the size of your page.

2. Stamp the Artistic stamper Slow Fast stamp and 2 of the Judikins instrument block images you like twice too and cut them out. Distress them using the Tim Holtz distress ink.

3. Cut 2 pieces of acetate to fit your page and using a clear dry glue stick the stamped images back to back then to one of the pieces of acetate. Once dry stick the 2 pieces of acetate in between the 2 pieces of cut paper making sure the shapes line up.

4. Decorate the page with 7gypsies Numbers rub ons and any other embellishments you want!


I have 2 more pages and techniques to show you then onto something new!

  Happy crafting
                                           Love Katrina

Tuesday, 5 March 2013

Steampunk page #2 embossing

Hi there, Katrina the design elf here with the second of my Steampunk pages. I like different sized pages in my books to add interest and to use up those scraps too !!

  This page also uses the Tim Holtz edge dies and embossing plates to give it a steampunk look. Here is how I made my page....


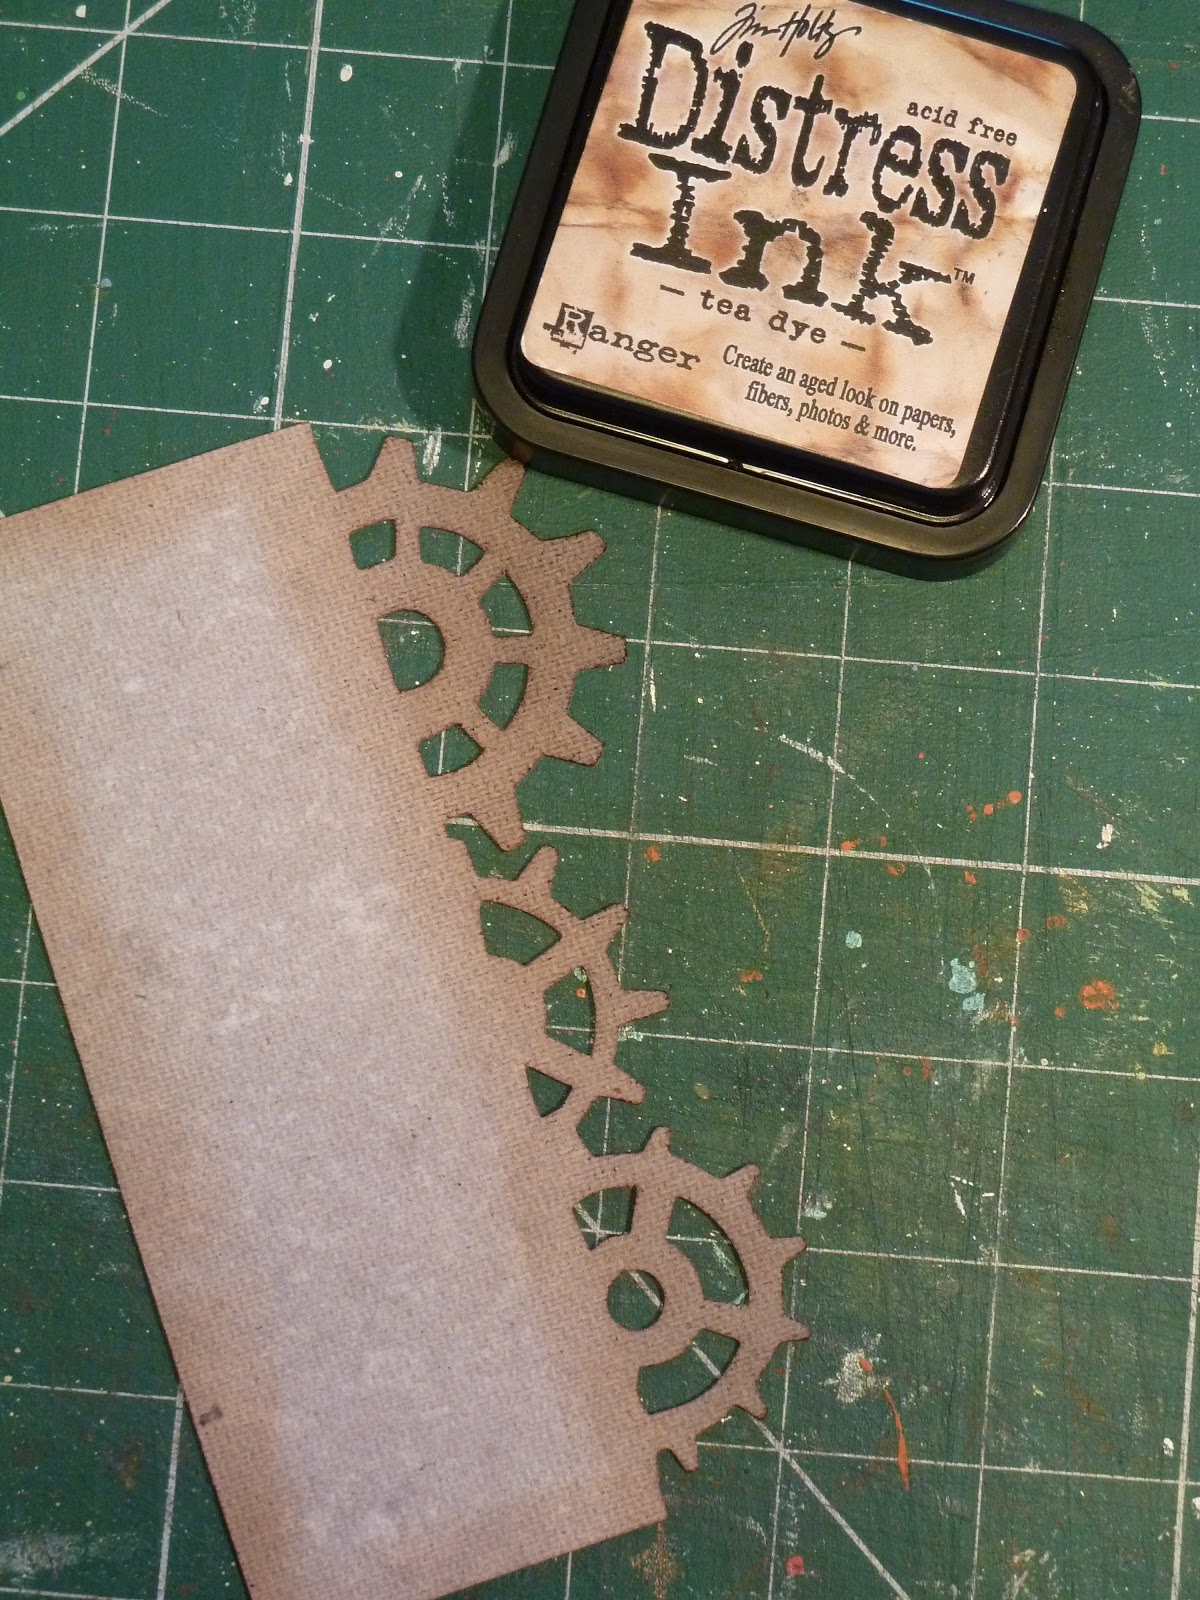
First I cut a piece of Grunge board and using the Tim Holtz on the edge die Steampunk. Then using the Tea dye distress I inked the edges on both back and front. This didn't really give me the look I wanted so I .....


Reached for the Imagination craft mica powders velvet dream. I took a tiny amount of powder and added a drop of water and mixed it into a paint. I then painted the edges front and back.


I then cut a piece of the Bo Bunny Timepiece paper and ran then through the Watch and Steampunk texture fade and then rubbed some of the Tea Dye distress ink onto the embossed paper using the application tool.


 Here are my finished pages. Of course you can use any images or photos you want too, just have some fun with it.

         Happy Crafting
                                     Love Katrina

Friday, 1 March 2013

Steampunk page - masking tape technique

Hi there Katrina the resident Fruit Pixie designer here with my first page of my Steampunk book. My idea for this book was to share my favourite mixed media techniques, so here is the first one, using masking tape!!

  I would like you to meet Mr and Mrs Hunt and their little pet Horris. Mr Hunt is an inventor of wondrous things, including their little pet too I think!  Here is how I made their page.


First I cut a cabinet card shape from the Alterations cabinet card die out of a stiff card. It could be a cereal box card as you wont see the back. I then ripped up pieces of masking tape and covered the shape, layering one strip on top of the other slightly to give lots of texture. Burnish it down well with the end of a ruler or bone folder.


Make up the colour of your choice from the Imagination Crafts mica powder kit with the magi bond it comes with, into a wonderful paint and cover your masking tape. You can add a second colour too if you wish. leave to dry.


Cover your page with the Bo Bunny Timepiece collection paper and add your masking tape cabinet card on top.


Add images and embellishments, I chose one of the steampunk clock charms and the Tim Holtz light bulbs which are no longer available at the Fruit Pixie.

 Now I covered a cabinate card shape for this page but you can use this technique on anything you like for cardmaking and scrapbooking. It gives a lovely textured finish and using the mica powder paint has a wonderful two tone sheen too. Why not have a go.

Happy crafting
                           Love Katrina


Friday, 20 July 2012

Kaisercraft Miss Match & Clear Acrylic Stamps

The Kaisercraft Miss Match range is a fabulous mixture of all sorts; patterns, plains, ephemera and puzzles all in gorgeous faded vintage colours.

Featuring 12x12 papers with fabulous names such as Bric a Brac and Clutter; all double sided of course...

Bric a Brac

Clutter
and not forgetting the wonderful Bingo Clear stamps


Miss Match Clear Stamps

and a huge pile of Collectables cardstock ephemera!
Miss Match Collectables
It is a fabulous collection which will coordinate nicely with vintage ephemera items and give a slightly feminine slant to any Steampunk projects

Also from Kaisercraft are some lovely Vintage themed and Background texture stamps.
All stamps are clear acrylic 'cling' stamps. Use with your acrylic blocks.
Vintage Love


Graffiti


Sunday, 13 May 2012

Steampunk Charm Bracelet

Steampunk Charm bracelet with paper beads

You will need -
* A selection of steampunk charms
* Large link chain, you could use Tim Holtz Idealogy Lace chain
* Jump rings
* Closure
* Bo Bunny Timepiece paper collection 6x6 pad
* Beads
* Wire
* Inkssentials sepia Accents
* Cocktail picks
* Side cutters and round nose pliers
* PVA glue


1. Using your side cutters cut a piece of your chain the length you need. Open your jump rings by twisting front to back. Attach your charms onto the chain.
2. Choose a piece of paper from the paper pad and cut a strip of paper 2.5 cm wide. Cut in half and form the end into a long point. Ink the edges. Roll your bead up from the straight edge around a cocktail stick. Unroll the bead half way and apply PVA glue then roll back up and hold until stuck. Leave the bead on the cocktail stick and paint on the Sepia accents and then leave to dry. Make up as many beads as you need.
3. Once the beads are dry wrap wire around each bead. Using your other beads make up little charms on your head pins, leave enough space at the top to be able to make it into a loop to attach to the bracelet.
4. Take your round nose pliers and bend the head pin over to 90 degrees. Group the very end of the head pin in the pliers and wind around the end of the pliers to form a loop. Don't close it over completely until you have it hooked over your chain then finish the loop off. Repeat for the rest of the beads.
4. Attach your clasp with a jump ring and its ready to wear!!

Steampunk Artdoll

The Steampunk style is really pushing through to mainstream now even though the 'genre' has been around since the 80's. This is a great way to try out the Steampunk style on a smaller scale. There are loads of papers, stamps and bits and pieces around now that fit right in with the Steampunk theme.
If you fancy stretching your mechanical wings more give this fabulous project a try.
Happy Steaming!!!


Steampunk Artdoll -

I used the following - * Die cut paper doll with brads
* Bo Bunny 6x6 Timepiece collection
* Daisy Bucket clearly Petite sprocket stamp
* Eco Green chipboard sprockets
* Eco Green steampunk stamp set
* Tim Holtz movers and shakers sprocket dies
* Eco Green Acrylic paint - skin colour
* Ranger crackle paint

I also used - * Faces from pictures or magazines or draw them yourself
* Hat, tie and bag from an old catalogue or a magazine
* Wire to make her glasses and a piece of chain and eye pin to make the tie pin and chain
* Decorative pearls and feather from my pet Cockatiel( he was moulting promise! )

How I put her together -

1. Pop out all your paper doll bits. You might want to give her a bit more of a waist, draw more of an hour glass figure and cut along the lines. Paint the neck and arms skin colour. Choose your face and glue to the head, trim any excess card off around the face and make the neck fit the face by trimming down.

2. Use your dolls body and arm as templates, draw round them on the back of your choice of paper then design your top around them. Remember the way your pattern runs on your paper. Cut them out.

3. Attach your legs to your body, any brad will do as you won't see them and then lay them on the back of your chosen paper for your skirt and design the skirt you want. Cut out. Use a tiny scrap of the card from the leftover of your doll to make heels for your dolls boot/shoes. Stick the heel to the back of the foot and re-shape the foot to look like a boot/shoe and paint them. Use a pen to add detail once dry.

4. Now you have all the basics done its time to decorate your doll's clothes. I used the movers and shakers sprockets and cut them out of the dark red plain paper and added them to her skirt. Stamped the sprocket stamp on the sides of her top. Using the steampunk stamp set stamped the words and small dream and believe onto old book paper, cut out and stuck the larger words to her skirt and small ones to the top of her sleeves. Her hat, tie and bag came from an old catalogue but you could either make them yourself or cut out from a magazine. Her hat was decorated with a painted chipboard sprocket and then crackled with the ranger crackle paint and a feather donated by Dexter , one of my cockatiels.

5. Her glasses were simple to make. Use some thin wire and wind one end around the end of something that is the size you need and secure by twisting the wire round itself a few times. Take whatever you used to make the round and place it right next to the formed circle, bring the wire over your form and secure again over what will be the nose part of your glasses. Cut off with wire cutters NOT your best scissors and play about with them till you are happy. I glazed mine with a product called fantasy film but you don't have to. You can add a chain and pin like me if you would like then all you have to do is add all those little bits to make it yours. Enjoy!


Saturday, 12 May 2012

Steampunk Winter Tapestry


Steampunk Angel, a Christmas/Winter card made using some of the new Stamp Connection Steampunk Stamps, Winter Tapestry, PaperArtsy Hot picks, Tim Holtz Distress Inks and Imagination Crafts Indian Spice Silkies...Which I LOVE!!