Showing posts with label Imagination Crafts. Show all posts

Wednesday, 20 March 2013

Clearance Sale


Our clearance sale continues apace, while some lines have almost sold out (Fresco Finish, Eco Green Paints & Walnut Hollow Creative Metal) we are still adding reduced lines.
 
We are currently selling the following products at 50% off RRP;
 
Jenni Bowlin
Dovecraft
Jillibean Soup
Selected Bo Bunny Lines
Imagination Crafts
Eco Green Crafts
Kanban
La Pashe
7 Gypsies
Black Market Paper Society
Selected Craft UK Card Blanks
 
also all Christmas stock and wood mounted stamps are now reduced, so come and grab a bargain before it all goes...
 
New products are arriving daily and we've just opened boxes of new unmounted stamps and gilding flakes and glitters from Creative Expressions so keep an eye out for them appearing on the site in the next couple of days.
 

Tuesday, 5 March 2013

Steampunk page #2 embossing

Hi there, Katrina the design elf here with the second of my Steampunk pages. I like different sized pages in my books to add interest and to use up those scraps too !!

  This page also uses the Tim Holtz edge dies and embossing plates to give it a steampunk look. Here is how I made my page....


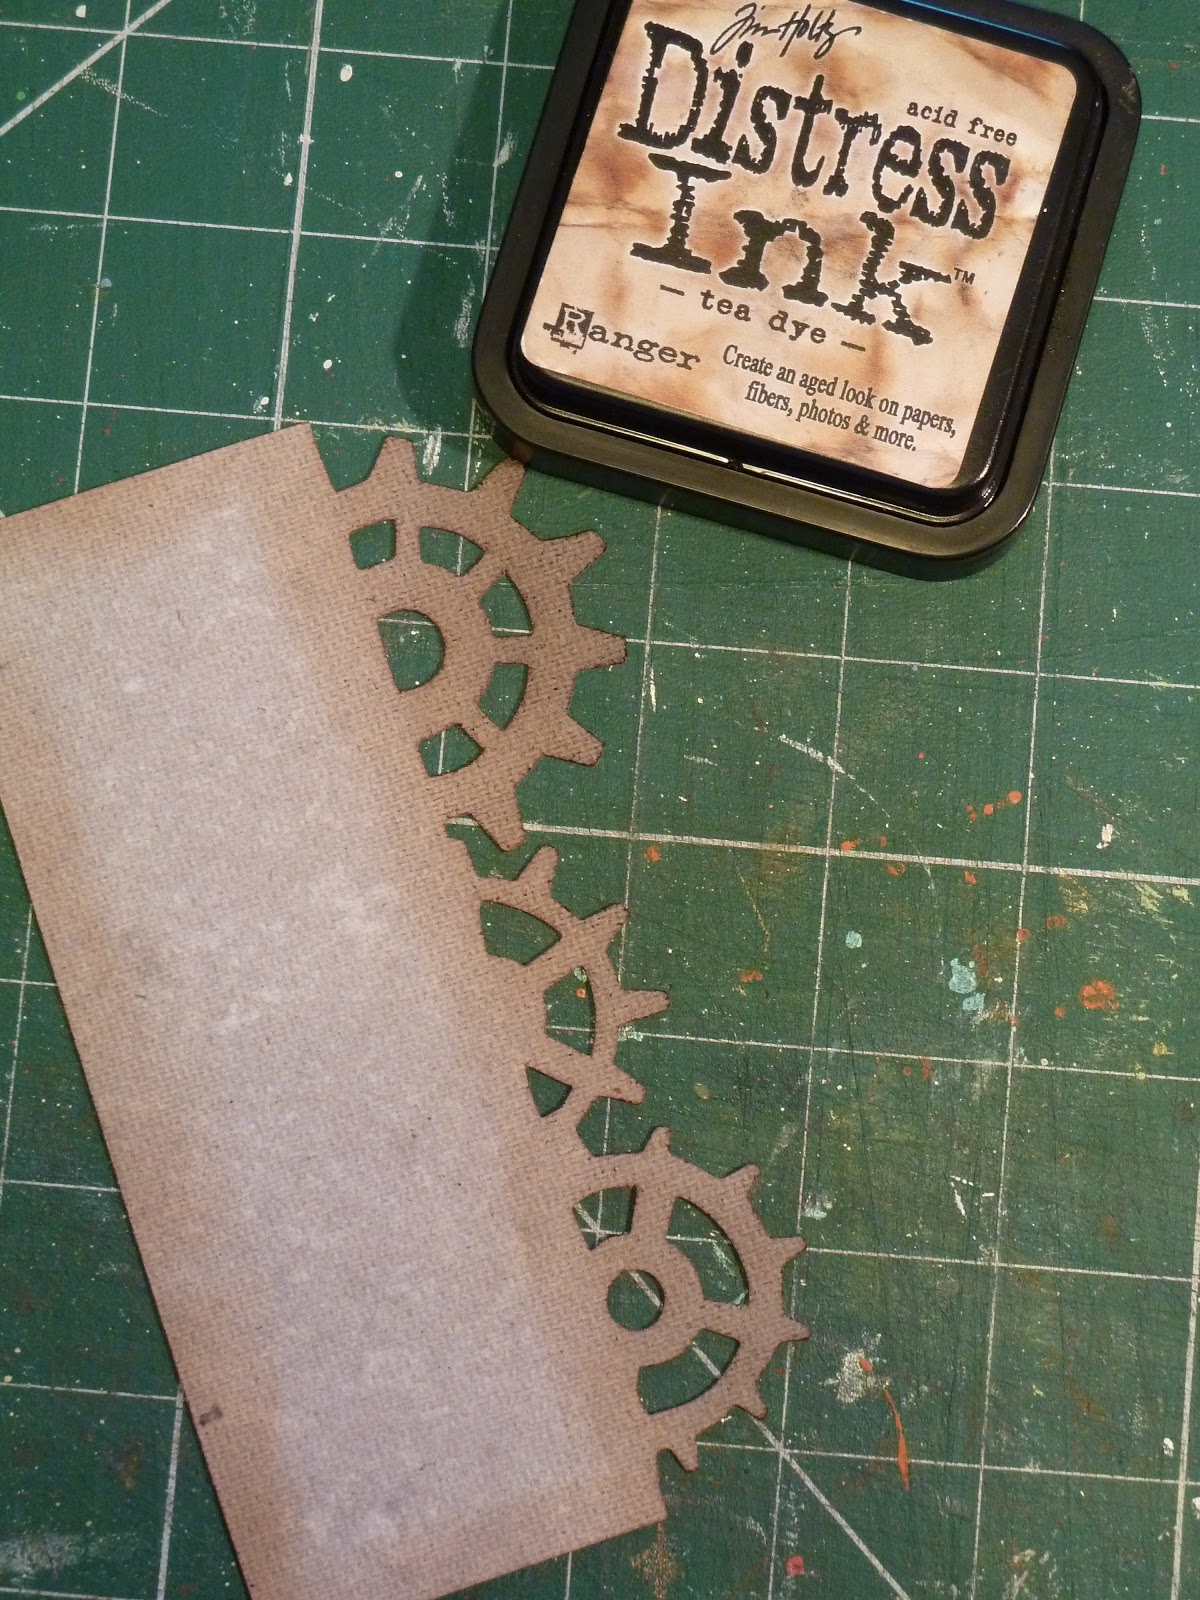
First I cut a piece of Grunge board and using the Tim Holtz on the edge die Steampunk. Then using the Tea dye distress I inked the edges on both back and front. This didn't really give me the look I wanted so I .....


Reached for the Imagination craft mica powders velvet dream. I took a tiny amount of powder and added a drop of water and mixed it into a paint. I then painted the edges front and back.


I then cut a piece of the Bo Bunny Timepiece paper and ran then through the Watch and Steampunk texture fade and then rubbed some of the Tea Dye distress ink onto the embossed paper using the application tool.


 Here are my finished pages. Of course you can use any images or photos you want too, just have some fun with it.

         Happy Crafting
                                     Love Katrina

Friday, 1 March 2013

Steampunk page - masking tape technique

Hi there Katrina the resident Fruit Pixie designer here with my first page of my Steampunk book. My idea for this book was to share my favourite mixed media techniques, so here is the first one, using masking tape!!

  I would like you to meet Mr and Mrs Hunt and their little pet Horris. Mr Hunt is an inventor of wondrous things, including their little pet too I think!  Here is how I made their page.


First I cut a cabinet card shape from the Alterations cabinet card die out of a stiff card. It could be a cereal box card as you wont see the back. I then ripped up pieces of masking tape and covered the shape, layering one strip on top of the other slightly to give lots of texture. Burnish it down well with the end of a ruler or bone folder.


Make up the colour of your choice from the Imagination Crafts mica powder kit with the magi bond it comes with, into a wonderful paint and cover your masking tape. You can add a second colour too if you wish. leave to dry.


Cover your page with the Bo Bunny Timepiece collection paper and add your masking tape cabinet card on top.


Add images and embellishments, I chose one of the steampunk clock charms and the Tim Holtz light bulbs which are no longer available at the Fruit Pixie.

 Now I covered a cabinate card shape for this page but you can use this technique on anything you like for cardmaking and scrapbooking. It gives a lovely textured finish and using the mica powder paint has a wonderful two tone sheen too. Why not have a go.

Happy crafting
                           Love Katrina


Friday, 1 February 2013

Button Valentine


Hi Katrina here, the resident design elf with another project for you.
 
Sarah-Jane inspried me to create my version of her button heart.
 

   For mine I used a piece of packaging as the base and covered it with a piece of the 7 Gypsies Trouseau papers . I then used some of the wonderful Fruit Pixie buttons, the bright selection, and one of the Romantic word tiles to finish it off, glued on with Imagination Crafts Magi Bond. I then went around the edge of the piece with Tattered Rose distress ink. Quick, easy and fun!

Gloss Resist Tags

I learnt a new technique the other day and had to give it a go and share it with you...
 
 
If you like the resist look then this is for you. You need a template of your choice and Eco Green Artist Medium Gloss ( you can do it with the Matt but ...the gloss works better ) You also need an old credit card type thing to apply the medium and a surface to apply it to.

I decided to make some tags so cut the PaperArtsy Smoothy Card with the Alterations Die Tag & Bookplates Then applied the Artist medium with the credit card making sure all the areas were covered, removed the template and left it to dry. Then something magical happened, when it dried it gave a crackle affect! It must be what the card is coated with!! Looks cool though!

I then used PaperArtsy Fresco Finish Acrylics to colour the background and decorated it with Kaisercraft Miss Match Bingo Cards and Kaisercraft Collectables Miss Match. I filled a Creative Expressions Glass Vials Medium with Imagination Crafts Magi Glitz
Gel - Arctic Frost and tied a tiny White Jewellery Tags and stuck on the tag to finish off. Hope you like it!


The Fruit Pixie design elf here again with the other tag I made using the resist technique I described before. This time I went bright, which is slightly unusual for me but it shows the different effects you can get with this technique.


I used the same as before, a tag cut from the PaperArtsy Smoothy Card and the resist technique that again gave a crackle affect. This time though I used the Cosmic Shimmer Chalk Misters in Yellow, green and blue. I then cut a Alterations tattered flowers die to cut the rose shaped flowers out of Foundations A4 Kraft Twistwrap 10 sheets, which is great fun to play with if you haven't yet tried.
 
To add the colour to the flowers and the Tattered leaves cut from the same paper I used Imagination Crafts Silkies which I love. I then added a button form Sarah's wonderful button collections, added BLOOM using Alterations Die Typeset Alphabet to the leaf and finished off the tag using something very unusual!!


Bet you can't guess what it is?????????
 

Nellie Paper Doll

Happy New Year everyone from me, Katrina the Fruit Pixie design elf!
 Now things are back to normal I am back in my craft room again.

I would like you to meet Nellie my paper doll made from the 7 Gypsies Trousseau collection.


I used a part of the Trousseau Grace paper, the one with all the wonderful pictures on it and then I just used my scraps to make up her clothes.
For the body I used the Artistic Stamper Art doll stamp set, large. This is good to give you a base but you can re cut the shape to fit with what you have in mind. I went for an Edwardian look to match the paper but you can do what ever you want.

Other things I used were - Some small brads for her joints. Imaginations crafts silkies to paint her shoes, I used Turquoise lace from the Persian velvet set. A little bow from the Craftime Enchanted ribbon bows, the little pearls are from the same collection. The flower in her hair is from the brights button collection.
 

    I think that is all. Hope you like her and have a go at making one of your own. Happy crafting, love Katrina

Tuesday, 18 December 2012

Tea - Light Lantern

Hi everyone, Katrina here The Fruit Pixies little design Elf with another Christmas craft idea,so make yourself a cup of tea and grab a mince pie and lets get crafting!

   I have been working again with Craft UK Collage topper sheets again, I used Joy this time.

   This little lantern to use with a tea light but please be careful*, is really easy to make and only uses 1 sheet of card for the lantern itself....


So take the backing card and cut it down to 51/2 x 10 3/8. The place it on the Hougie board and score at 2.5, 5, 7.5 and 10. Then turn the card around and score a line at 1.5, this will be the bottom of the lantern so if you are using a pattern with a top and bottom this needs to be at the bottom. You then need to cut the scored lines up to the 1.5 line you have just scored.

  Now to cut the apertures, use any shaped die that will fit in the panel and cut them out. Place velum on the back of each aperture. Choose the images you like from the toppers and cut them out. I used a little snowflake punch to punch out snowflakes from the waste twinkly card. Fold up your lantern and glue together. Add your images and embellishments and you are done.

      Hope you like it, tell me what you think and better still show me yours!
Happy Christmas crafting, love
Katrina
 
*or you could use a little battery operated one, FP!

Quick & Easy Christmas Cards

Quick and easy Christmas cards
Hi there Katrina The Fruit Pixies little designing elf here with some quick and easy Christmas cards you can make with the Craft UK Die Cut Collage Sheet sets.
 
They come with a sheet of die cut folded toppers and a sheet of really good quality cardstock. These are perfect for quick and easy cards and other projects.
 
 Of course every Christmas project has to have a touch of glitter and the best glitter glue I have ever used is Imagination Crafts Magi Glitz Gel - Arctic Frost If you have never tried it add it to your next order and give it a try, you won't be dissapointed!


The card is such good quality I was able to make a sweet little box too.


Monday, 23 July 2012

Olympic Record Book & UTEE Pendants

If you saw the fabulous record book & Pendants Katrina posted on Face book and have been waiting patiently for the full instructions here they are...finally!

I used -
* Bare Chipboard Album Tabbed
* Eco Green Acrylic Paints - Green patina, Gold, silver and bronze
* Vintedge Collection Pack
* Vintedge Paper Twine 15yds
* Craftime Britannia Ribbons
* Exquisite Pigment Ink - Lapis
* Craftime Britannia Laser Mesh Sheets

How I made my book -
1. Use the fantastic paint to paint your book. I used the green patina for the covers and the back page then used the gold, silver and bronze for each of the tabs. Leave to dry,
2. Trim the papers down to fit your pages. If you like the inky look, ink around the edges with the Lapis ink and the to add the dotty pattern apply ink with a sponge through the mesh sheets in a random way.
3. For the front cover I used a image from the collage sheet paper from the collection pack along with the word London. I cut the other words with my Cricut but you could use any letters you like.
4. On the back page I used an off cut of paper to make a pocket to add any keepsakes. Put you book together and add the ribbons to the book rings.


So now you can make it your own, my plan is to add the medals won as they happen to the appropriate page and use the other pages to add memories and journalling along the way. But you could add pictures and journalling of how you celebrated the year the Olympics came to London.
 
 
UTEE Pendants


Before we start just a bit about the difference between normal embossing powder and UTEE (Ultra thick embossing enamel). Embossing powder, which is very fine granules, like powder is usually used on top of a stamped image, although there are lots of other things you can do with them. The granules are fine enough to stick to the ink and keep the fine stamped lines of the image. They are then heated with a heat gun and melt into a raised line. With UTEE the first thing you will notice is it has much larger granules, like sugar. So not good for using over a stamped image but great for melting and pouring into shapes and covering large areas. Again there are lots of ways to use it and things to make with it. If you have any questions just ask but do have a play with them, they are such good fun. Just watch your fingers as they get very very hot!!

So here is how I use UTEE in my melt pot. If you don't have a melt pot you can still use UTEE. You will need a heat gun, a hair drier won't do the job as it blows air and will just blow your powder all over your table and also its just not hot enough. You can hold the little pie trays with a wooden peg, the tray gets very hot, and use your heat gun to heat from the bottom till the powder melts. If you have a melt pot though get it out, heat it up to UTEE -

I used -
* Melt Art Texture Treads Mod Circles
* Imagination Crafts Magi Boss Chunky Mother of Pearl
* Cosmic Shimmer Malachite Fire 20ml UTEE
* Metal pie trays, the small ones
* Wooden cocktail stick
* Wooden peg
* Melt pot or heat gun
* Mould of some sort like a small cookie cutter or as I used the plastic inside of a roll of tape!
1. Put the powder into a little pie dish
2. Place the pie dish into the melt pot. You can just pour the powder into the melt pot but then you have to clean it out and you can only melt one powder at a time. This way you can get 3 pie dishes in, just. Pop the lid on and wait till it melts.
3. In the mean time decide where you wish to pour on the Texture tread and place your mould over the area.
4. Once the powder is molten carefully pop a wooden peg onto the dish as a handle and pour the molten powder into the mould to cover the bottom.
5. As quickly as you can put a cocktail stick into the top of your mould if you want to use it as a pendant and leave to cool.
6. Remove from the texture tread and push out of your mould. Then make some more!!
7. If you don't like the way it turned out just throw it back in to the tray and re melt it and pour it again, the same with any little bits you get, just throw them back in the dish. Once you have finished leave all the dishes to cool, stack them on top of each other and store. When you want to play with them again jut pop the dish with the solid UTEE onto the hot melt pot and off you go again. You can of course mix your powders and molten powder together if you like.

The examples were all made this way, the top 3 were made with the mould, the one on the bottom in the middle is a piece of sequin waste punched out with a circle punch and put at the bottom of the mould then the mother of pearl poured over the top. The gold and blue ones at the bottom were just poured free hand straight onto the texture tread.
I know the texture treads are an investment but other ideas of how to use them coming up!


Sunday, 13 May 2012

Celebration Bunting


Hi there, Katrina here. I have been working on a colourful banner that would be great for any celebration but especially the Jubilee coming up this summer. There are a couple more photos in the photo album. Here is how I did it.

I used -
*... Craft UK Bunting Pack Jubilee Scallop. Also available in straight edge.
* Vintedge Collection Pack
* Craftime Britannia Glitter Chipboard Alphabets
* Craftime Britannia Glitter Sheets
* Craftime Britannia Laser Mesh Sheets
* Craftime Britannia Mini Crystals
* Imagination Crafts Magi Glitz Gel - Arctic Frost

How its all put together -
1. Make a template for the size of paper you want on your banners and cut out from the Vintedge papers. The problem being which ones to choose!! Stick them to the banners

2. Cut out circles from the glitter sheets and a smaller circle from the mesh sheets. You can use a punch or die cutting system.

3. I then found it easier to lay the banner out as you wish it to hand and place the glitter pieces and mesh pieces on top then the letters ( there are 3 e's in one pack of alphabets) Once you are happy with the way it looks use a wet glue, I use glue gel, on the back of the letter and stick it on top of the mesh and glitter circles. That way you glue it all down together. Then stick the glitter circle to the flag.

4. I then used a die cut to cut a decorative edge from the scraps of paper and decorated it with the mini crystals and dabs of the Magi Glitz gel. You can add any little gems you have or more of the mini crystals to the letters. Let it all dry and you can thread the flags onto the string that comes with the bunting pack and you are ready to hang it up.

Advent House


Advent House

 I made this house the first time for a class I taught at Bristol Scrappers for Halloween, when I was working on the Witches house I thought what a wonderful Christmas project it would make. The right side of the roof lifts up so you can fill it with treats and have one a day till Christmas. If you have any problems along the way please email me and I will try and help.

You will need -

* Foam core board or Grey board or Mount board ( available through your art shop or Hobby craft )
* 2 sheets Bo Bunny 12" Snowy Serenade Limited edition  - Serenity
* Tim Holtz Tissue tape
* PVA glue
* Tim Holtz Alterations - On the fence
* Tim Holtz Alterations alphabet - Carnivale and Typeset
* Imagination Glitz Gel - Art frost ( The most amazing glittery effect, treat yourself, you will be amazed!!)
* White and dark blue cardstock
* Pom Pom trim any other decorative trim, Bo Bunny do some nice ones.
* Butchers twine.
* Masking tape
* Thick cardstock
* Rock candy crackle paint.

1. Cut out the pieces you need from your Foam core board. You need -
                           Sides - x2 - 2.5 x 3.5"
                           Ends - x2 - 2.5 x 2.5" to the bottom of the apex then draw a triangle on the top to form your house shape.
                           Base -  x 1- 5 x 5
                           Roof - We will measure that later

2. Cover all the edges of the base, ends and the top edges of the sides with tissue tape. Cover all the pieces, both sides, with the Bo Bunny paper.

3. Using PVA glue all the sides together to form a house. You need to put quite a bit of glue on the edges then hold together until stuck. You can use the lines on your cutting mat to make sure it is square. Then stick to the base.

4.Measure the size of your roof pieces you need and cut them out of Foam core board. Cover the outside with tissue tape and the inside with Bo Bunny paper.

5. Cut a piece of masking tape slightly longer than the length of your roof pieces and place it sticky side up on the table. This is going to make the hinge in the roof. Place the right hand side roof piece tissue tape side down onto the right hand side of the masking tape. Then leave a gap, the thickness of the board you are using, and place the left hand roof piece on the left hand side of the masking tape, again tissue side down. Cut another piece of masking tape again slightly longer than the length of your roof piece and fold in half length ways. Place that in the gap between the roof pieces and using a bone folder burnish it well so it sticks to the other piece of masking tape and the sides of the roof, trim. You should now have a hinged roof. If it wont fit on your house re do your hinge leaving a slightly wider gap between the roof pieces. Glue the left side of the roof to the house, leaving the other side to be lifted up to get your treats out !

6. Cover the masking tape with tissue tape and glue the Pom Pom trim around the roof. You will need to make a cut at the top of the apex so the roof can open.

7. Cut 4 fence pieces from the On the Fence die, then 8 pieces from the white card. You can cut more than 1 piece at a time. Stick the white card to one side of the the fence pieces and paint on the Rock Candy crackle paint. Leave to dry. Stick the remaining pieces of white card to the other side of the fence pieces.

8. Cut out numbers 1 - 24 in dark blue card from the Alterations Carnival alphabet and cover them in Glitz Gel leave to dry. Stick numbers 1 - 23 around the sides, back and roof of the house. Leave the front for a door cut from white card and mount onto the dark blue card and add the number 24 and outline with the Glitz Gel. Stick to the house.

9. Glue Butchers twine around the roof and the door and stick the fence around the base. Cut Let it snow four times and stick them around the fence. Apply the Glitz Gel so it looks like snow. Leave to dry and fill with treats! Now you are ready to count down to Christmas!!

Katrina's ATC Folder


ATC Folder - If you make or collect ATCs its nice to have something to keep them in to show your friends your collection. This is a lovely way to keep a themed collection together too.

OK you will need-
some card stock,
Woodware Vellum envelope ATC kit,
Crafthouse Press collage sheets - Brodies Imperial collage and American prescription,
U mount Vintage games stamp set,
Distress ink - old paper and Tea die,
old book papers,
Imagination Inkadinks - brights
Alterations Die Chip Block alphabet

To make -
1. From your card stock cut a piece 8 3/4 by 3 inches, a piece 3 3/4 by 3 inches and a third piece 5 1/2 by 3 inch
2. Take your 8 3/4 by 3 piece and score at 4 and 4 1/2 inches. Fold. This is your back and cover. Take the 5 1/2 by 3 piece, with the 3 inch being the height, score and fold every 1/2 inch to form a fan fold. this is the bottom of your folder.
3. Use your Distress inks to age all your card pieces and the stamp the checker board from the U mount stamp set onto the front cover. Using a foam sponge apply the blueberry ice ink from the inkadinks around the outside edges. Cover the reverse with book papers.
4. Use double sided tape to attach the back cover to the fan folded piece. Cut 2 small strips of card and attach them to the front of the fan fold, fold around then back up the back of the fan fold to keep it all under control. Then attach the 3 3/4 by 3 pieces of card stock to the front of the fan fold.
5. Carefully take out 5 of the vellum envelopes, the library card style ones, from the set, make them up and then attach with double sided tape to the back of each fold.
6. Now to decorate the front. Cut out and distress with ink the 2 playing cards from the collage sheet. Stamp onto brown paper the middle part of the Bingo card and the heart and club images from the stamp set with brown ink. Cut out Bingo card strip and use a round punch to cut out heart and club images.Stick the cards and Bingo strip to front cover.
7. Cut another strip of card to make the closer, bend around and stick to the back of inside cover. To this attach the heart and club images and A T C cut from the Alterations alphabet.
All you need to do now is fill it with ATCs!! If you want to use more envelopes, then just make a longer fan fold base. I have made a larger one using little brown envelopes to keep my Cinema tickets in, decorated accordingly.

Home ATC

Home ATC -

Using the Tim Holtz Alterations die Townscape cut different co-ordinating pattern papers, about 3. Take an ATC blank from any of the wonderful ATC blank sets ( I used the Woodware blanks ) and using the Imagination crafts Inkadinks ( I used the brights ) which are my new fave things, paint yourself a background. Don't worry too much about this just a line of green and a wider line of yellow and orange.
Take the Townscape you cut earlier and cut up the individual houses and then re form a line of houses on your ATC. You don't have to copy it to the letter. Once you are happy stick them down.
Use a black pen to outline the houses and add some stars and the word home at the bottom. If you don't want to do your own lettering then you could use stickers or rubber stamps or even the great new alphabet dies from Tim Holtz.

Spooky Skull


Spooky Altered Skull

You will need -

     Plastic skull - mine was from Wilkinsons for 50p
     10 Assorted vintage book page pack
     Silkies by Imagination crafts - I used Pearl satin and Onyx satin
     Imaginations Crafts Magi bond
     Black Stickles
     Craft sheet


 1. Tear any borders off of your book pages and keep to use on later projects, I love to stamp onto them to give you an instant vintage look. Tear them into strips from top to bottom and crumple them a little. This helps them mould to the shape of the skull.

 2. Apply PVA glue to the back of each strip in turn making sure they are covered edge to edge and cover the whole skull. While the glue is still wet press it into the features of the skull.

 3. Cover the skull with Pearl Satin Silkies. I found the easiest, perhaps not the cleanest way, was to paint some onto the craft sheet and then using my finger rub it onto the skull. Once you have covered it completely highlight his features using the Onyx Satin Silkies. You only need a tiny amount so again I found it easier to control to use my finger.

 4. Add black Stickles for his eyes and you have your own spooky altered skull!!   Happy Halloween!!

Chinese Triptych

Chinese Triptych

Katrina used -

* Card stock
 * 20 Assorted Josss paper pack

* Assorted Oriental Ephemera

* 12 Crafthouse Press Oriental Woodcut Prints

* Replica Chinese coin

* Alterations Die Vintage lace

* Imaginations Crafts Magi Bond

* Eco Green Acrylic Paint Pure Gold

* Craft time Silicone glue

* Hougie board - optional


1. Cut a piece of card 8x5" and sore a line at 2" and 6" so you get 3 panels, 2" 4" 2".

2. Apply PVA glue to the middle panel and stick one of the Joss papers. Don't worry if it goes over into the other panels, it is so thin it won't show. Cover the side panels in the same way.

3. Cut out one of the wood cut images and glue it to the left hand panel. Cut the images from the chopstick wrapper and glue them down the right panel.

4. Cut a length using the Alterations vintage lace die from a co-ordinating paper or card ( I used the wrapper from my Chocolate bar I was eating at the time, well you have to have chocolate when you are crafting and I'll use anything in my projects!! ) and glue it to the top and bottom of the middle panel.

5. Paint the Eco Green pure gold paint round the edges of your triptych and around the images from the chopstick wrapper to help them blend in.

6. Glue a Chinese coin the top of the left panel and bottom of the right one using silicone glue, leave to dry and you are finished!

Halloween Treat Cone


Halloween Treat Cone
* Tim Holtz Idea-ology paper stack seasons
* Tim Holtz Idea-ology Salvage stickers seasonal
* Alterations die Mini Rosettes
* Tissue paper
* Orange card and black card
* Ribbon and bakers twine
* Double sided tape
* Imagination Magi bond
* Dinner plate
1. Draw around your dinner plate on scrap paper and divide into 3, like the old CND logo. Cut 1/3 of it out and test it makes a good cone shape. Place your template onto the Halloween paper from the seasons paper stack, the curved edge being the top and draw around it, cut it out.
2. Place double sided tape around the curved edge of the shape. Cut a piece of tissue paper slightly wider then you need to go around the cone and deep enough for you to add all your treats. Peel off the backing of the tape and stick the tissue paper to the cone.
3. Roll the cone up and stick together with double sided tape. Fill with treats and tie up with ribbon and bakers twine.
4. Make up a large rosette from the Alterations die. The Imaginations magi bond is great for making these up as its so fast drying it stops them biting back!!! Add the 31 sticker from the Halloween sheet of the Salvage stickers. Stick to front of your cone.
5. Take the Trick or treat sticker from the Salvage stickers and back with black card, cut another piece of black card the same size. Sandwich one end of the bakers twine between your 2 pieces of black card to form a tag. You could write a message on this if you wish.
6. Cut the top of your tissue paper into points, add some black ink and you are done!!

Boo! Happy Halloween


Halloween Pennant

* Stix 2 cardboard sheets, cut into a pennant shape
* Tim Holtz Idea- ology paper stash seasonal
* Black, purple and orange card stock
* Alterations Die Mini paper rosettes
* Imagination Crafts Magi Bond
* Tim Holtz Idea-ology Memo Pins
* Die cuts to decorate
* Craftime Silicone adhesive
* Wire
1. Cover your pennant shape with your choice of Halloween paper from the seasonal paper pad.
2. Punch 2 holes at the top and thread the wire through and secure to form a hanger

3. Make up 2 of the larger rosettes in orange and one smaller one in purple. I find the Imaginations crafts magi bond is great for making these up as it is so fast drying it stops them fighting back!! Cut the orange ones in half with scissors and stick to the top of your pennant.
4. Cut out your decorations in black card and stick to the pennant. Slide an embellishment into the Memo pin.
6. Add any little bits and bobs you wish to make it your own and you are done!!